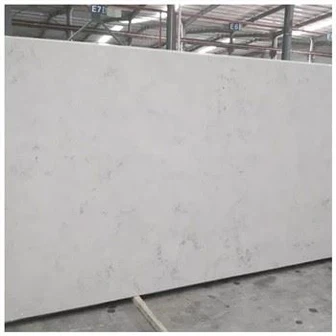
How Is Artificial Quartz Made
How Is Artificial Quartz Made
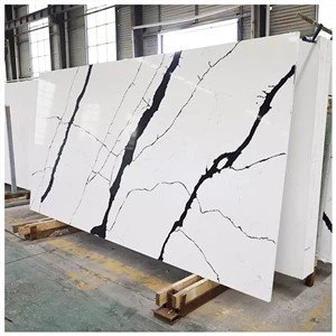
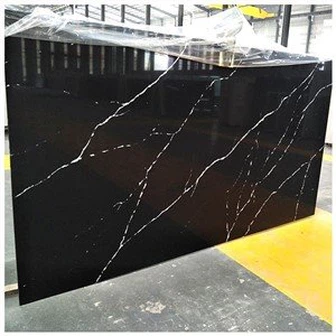
When people hear the phrase "artificial quartz," a lot of them picture a factory melting something and pouring it into a mold. That is not quite what happens, and the difference matters. I answer some version of this question on a regular basis, because clients who are comparing countertop materials want to know whether they are buying stone or plastic. The honest answer is that engineered quartz is a composite: crushed natural quartz held together by a small amount of resin, pressed and cured under controlled conditions into a dense slab. The mineral is real. The slab is manufactured.
I wrote this walkthrough because the manufacturing process, not the brochure, is what tells you whether a slab will stay flat, hold its color, and resist stains over years of daily use. Once you understand the steps, you can ask sharper questions when you buy. Let me take you through it from raw material to packaged slab.
What the Material Actually Is
Before the machinery, it helps to know what quartz itself is. Quartz is one of the most common rock-forming minerals on earth, and it turns up in all three of the main rock types. Chemically, it is silicon dioxide, written as SiO2, and it is one of the simplest and most stable mineral formulas in nature. Natural quartz has a glassy luster and no cleavage plane. Instead of splitting along flat faces the way some minerals do, it breaks with a conchoidal, shell-shaped fracture, the way glass chips.
When quartz forms in crystals too small to see rather than in visible points, it gets different names depending on how it grew: chalcedony, agate, and jasper are all microcrystalline forms of the same mineral. Pure quartz is colorless, but trace impurities, often transition metals, tint it into the colors you see in the natural stone world. And it is stable. Quartz does not readily weather or change into other minerals, which is one of the reasons the countertop industry builds surfaces around it.
In the countertop context, though, the mineral is only the filler. The slab you put in a kitchen is not raw quartz any more than a concrete sidewalk is raw rock. The way the factory binds the quartz is the part that determines how the finished surface behaves.
The Raw Materials in the Mix

A standard engineered quartz slab is about 90 percent crushed natural quartz. The remaining material is roughly 7 percent polymer resin, with pigments and a curing agent making up the balance. Those figures are not identical in every factory, because the ratio shifts a little with the color and the recipe, but 90/7 is the figure I use when I explain the material to a client. It is close enough to correct across the industry that it tells you what you are really buying: a slab that is mostly stone, held together by a small amount of plastic.
Crushed quartz crystal
The quartz filler comes in several grain sizes, from coarse particles down to fine sand and powder. The factory grades and blends these sizes to control density and surface texture. Larger particles give a chunkier, more reflective look; the fine powder fills the gaps between them. The hardness of the finished surface comes almost entirely from this filler, because quartz crystal sits around 7 on the Mohs hardness scale. That is harder than most kitchen knives and utensils, which is why a quartz top shrugs off routine cutting and sliding better than a softer stone.
The resin binder
Resin is the ingredient people forget about until something goes wrong. It is an unsaturated polyester resin, and its job is to glue the quartz particles together and seal the spaces between them. That sealing is what makes the slab non-porous, and it is the reason quartz never needs the periodic sealing that marble and granite require. It is also the weak point of the whole material. The resin, not the quartz, is what scorches under a hot pan and what discolors under harsh cleaners, so a lot of the care advice for quartz is really care advice for the binder.
Pigments and additives
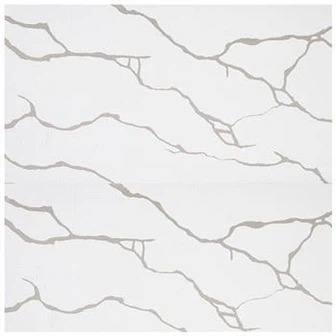
Pigments are added during mixing, which is why engineered quartz can be produced in consistent, repeatable colors and veining patterns. A curing agent is also added to make the resin set and cross-link properly. Some factories add crushed glass or mirror chips for a reflective, large-particle look. This is why two white slabs from different suppliers can look completely different even though both are called quartz, and why the recipe, not just the color name, is worth asking about.
The Twelve Production Steps
The actual manufacturing is a sequence of twelve steps. I will group them below so the process reads as a flow rather than a stiff numbered list, but every factory I have worked with runs through the same fundamentals: weigh, clean, mix, distribute, vacuum-press, cure, cool, polish, inspect, cut, and pack. Skip any one of them and the defect shows up later, usually after the slab is already installed in someone's kitchen.
Collecting and cleaning the raw materials
The first two steps are procurement and cleaning. The factory buys in quartz, glass, resin, and the auxiliary materials, then runs the granular raw materials through fans, an iron-removal system, and manual selection to strip out impurities and stray iron filings. This step matters more than it sounds. A single piece of iron that survives into the mix can show up months later as a rust stain on a finished countertop, and no amount of polishing at the end will fix contamination that entered at the start.
Mixing and batching
The cleaned materials are moved into a mixing system. Inside a gravity-free mixer, the ingredients are blended to even out color differences and particle distribution, so one corner of the batch does not come out darker than another. After mixing, the material is sent to batching silos, and the batching system weighs out the recipe automatically during production. Then the unsaturated polyester resin, pigments, additives, and granular powder are stirred together thoroughly. This is the point where the 90/7 ratio actually gets locked in, and where a sloppy batch becomes a slab with streaks and weak spots.
Distributing the material into the mold
The stirred mixture is carried on a conveyor belt into a material car, which feeds it evenly into the mold frame. Even distribution here is what keeps the slab's thickness uniform before pressing. If the material lands heavier on one side, no amount of pressing later will fully correct it, and the slab will come out of the furnace with a lean.
Vacuum vibration pressing

The filled mold moves to the press, where the material is vibrated and pressed under vacuum at about -0.1 MPa. The vacuum is the step people skip when they describe how quartz is made, and it is the one that matters most. Pressing without vacuum leaves air trapped in the slab, and those bubbles become pinholes and weak spots on the finished surface. The vibration settles the particles tightly together while the vacuum pulls the air out, which is how the slab reaches the density that makes it non-porous.
There are three forming methods in use. The press-plate method is the mainstream one, because quartz filler is so hard that it cannot be pressed into a block and then sliced the way artificial granite can be. A second method presses square billets, mainly for high-imitation quartz materials that have calcium powder added to them. A third method, casting, is used for some special-shaped products and by some small workshops. When I am checking whether a supplier makes a genuine slab, the press-plate method under vacuum is the first thing I ask about, because it is the method that produces the dense, consistent board people expect from the word quartz.
Heating and curing
After pressing, the green slab goes into a curing furnace and is heated at 85 to 110°C to set. The curing line temperature is the single most important control in the whole process, because it directly determines whether the slab will warp later. If the curing line runs too cold, the slab can deform after it leaves the furnace. If the temperature is uneven between the top and bottom of the line, the slab holds internal stress, and that stress can release during polishing later and bend the board out of flat.
Most factories use medium-temperature curing at 80 to 90°C, and some use room-temperature curing. Medium-temperature curing takes about an hour. The curing system is either a vertical flat-plate oven or a roller kiln. After the slab comes out, the workers tap several spots with an iron pipe that has a wall thickness under 3 mm. A crisp ring means the cure took; a dull thud means it did not set completely. It is a simple test, but it catches a lot of bad slabs before they ever reach a customer.
Cooling and thickness setting

The cured slab is cooled for 24 hours before it enters the thickness-setting machine. That full day of cooling is not optional. Polishing a slab that is still warm can release stress and warp it, and the flatness problems that show up later often trace back to a board that was rushed out of the cooling area. If the resin shrinkage is small, the semi-finished board can stand vertically on an A-frame, back to back. If the shrinkage is significant, the board is laid flat, and the surface is cleaned very smooth so the flatness holds through the later stages.
Cutting and polishing
After the thickness is set, the slab is water-milled and polished on a 20-head polishing machine. The target gloss depends on the recipe, usually between 40 and 70 degrees. Fine-particle slabs come out at a lower gloss, typically around 40 degrees. Large-particle slabs, especially ones with large glass chips, polish brighter, generally around 60 degrees. The factory picks the face that sat against the mold as the polishing side, because that face is flatter, cleaner, and denser from curing. Good granite grinding blocks and a sensible mesh sequence do the actual cutting, and the line speed is tuned to the material. Small-particle and solid-color slabs polish slower, while large-particle and light-colored slabs can run faster.
Inspection, cutting, and packaging
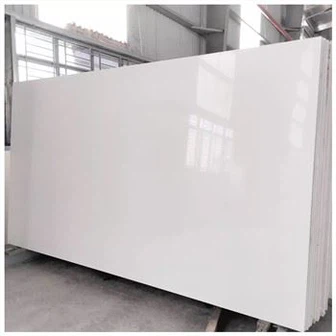
The last three steps close the loop. The board is inspected for surface quality, then cut to the required sizes on vertical, horizontal, and bridge cutting machines, and finally dried, packaged, and stored in the warehouse. A slab that passes inspection but is rushed through packaging can still arrive chipped, so the packing is part of the quality chain, not an afterthought. When I see a supplier that photographs and labels each packed slab, I read it as a sign that the same care ran through the earlier steps.
The Numbers That Matter, at a Glance
The ratios and parameters below are the ones I actually reference when I compare suppliers. They are not secrets, but they are the numbers that separate a slab pressed to density from one that was rushed.
| Component | Typical share | What it does |
|---|---|---|
| Crushed natural quartz | About 90% | Provides hardness, mass, and the non-porous structure |
| Polyester resin | About 7% | Binds the particles and seals the surface |
| Pigments | Roughly 2-3% combined with additives | Controls color and veining pattern |
| Curing agent and additives | Balance of the mix | Sets the resin and tunes texture |
| Process stage | Typical parameter |
|---|---|
| Vacuum pressing | About -0.1 MPa |
| Furnace heating | 85-110°C |
| Medium-temperature curing | 80-90°C |
| Curing time | About 1 hour |
| Cooling before polishing | 24 hours |
| Polishing | 20-head machine, gloss 40-70° |
What the Process Tells You When You Shop
When I help a client choose a countertop, I do not ask them to care about curing lines. I ask them to care about the outcomes the process produces. A slab pressed without vacuum will show pinholes. A slab cured unevenly will cup or bow after install. A slab polished before it fully cooled will have dull patches. These are the defects that trace straight back to the twelve steps above, and they are why two slabs that look identical in a showroom can perform very differently in a kitchen.
This is also where the price difference between suppliers usually lives. The vacuum press, the curing oven, the 20-head polisher, and the full 24-hour cooling time all cost money. A workshop that skips or shortens any of them can sell cheaper, and the savings show up later as warping, staining, or a surface that loses its gloss. I would rather pay for the full process once than re-top a counter later. This is where you don't cheap out.
If you are weighing quartz against granite or marble for a full kitchen, the kitchen countertop material guide lays out that comparison in more detail. And if you want to see how the raw slabs turn into usable tops, the quartz countertops range is where I send people who want to look at finished product rather than factory theory.

Frequently Asked Questions
What is artificial quartz made of?
Artificial quartz is roughly 90 percent crushed natural quartz bonded with about 7 percent polyester resin, plus pigments and a curing agent. The mixture is pressed and cured into a dense slab, which is why the material is also called engineered quartz.
Is artificial quartz the same as natural quartz?
Not exactly. Natural quartz is the mineral; artificial or engineered quartz is a manufactured slab that uses crushed natural quartz as its main filler. The resin and pigments are added in the factory, which is what lets the manufacturer control color and pattern so precisely.
Why is vacuum pressing important?
Pressing under vacuum removes trapped air from the mixture. Without it, bubbles remain in the slab and become pinholes and weak spots on the finished surface. Most presses run at about -0.1 MPa, and the vibration during pressing settles the particles tightly together while the air is pulled out.
How long does it take to make a quartz slab?
The pressing and curing stages are quick. Medium-temperature curing takes about an hour at 80 to 90°C, but the slab then cools for 24 hours before polishing. The full line, from raw material to packaged slab, is a continuous flow rather than a single timed batch.
Does the manufacturing process affect heat resistance?
Yes. The quartz filler tolerates heat well, but the resin binder does not. Direct contact with a hot pan can scorch or discolor the resin, so a trivet is always the safer habit no matter how well the slab was pressed and cured.
Final Conclusion
Artificial quartz earns its place in kitchens and bathrooms because the manufacturing process turns a hard, stable mineral into a dense, non-porous surface. The ratios, about 90 percent quartz to 7 percent resin, the vacuum pressing at around -0.1 MPa, the curing at 85 to 110°C, and the 24-hour cooling before polishing are not trivia. They are the difference between a slab that stays flat and a slab that fails a year after install. If you are choosing a countertop, ask your supplier about the press and the curing line, not just the color, because that is where the real quality is decided. I have walked these twelve steps enough times to trust a supplier who can explain them without hesitation, and that is exactly the standard KA UNITED builds its quartz production around.