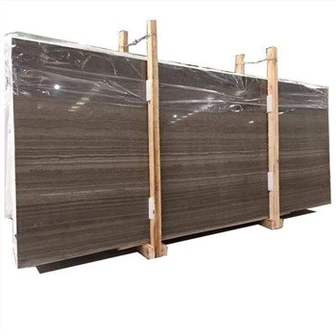
Teach you how to quickly identify the quality of quartz stone
How to Quickly Identify the Quality of Quartz Stone Before You Buy
I have spent enough years around countertops to know that the slab on the showroom floor does not always match what shows up on the delivery truck. When a family is renovating a kitchen, the budget usually pushes toward quartz because it should resist scratches, stains, and heat without much fuss. The catch is that "quartz" is not one material. It is a category, and some of what gets sold under that name is built to look right while cutting every corner that actually matters.
Most people pick a color first and ask about quality second. I understand why. The color is what you live with every day. But a surface that stains in the first week, or scorches under a hot pan, or scratches the first time a knife slips, will bother you far more than a slightly different shade ever would. That is why I keep a short routine I run on any sample before I recommend it. Four checks, each aimed at one specific way a manufacturer can cheap out.
None of these checks needs a laboratory. You can run most of them at a stone yard or on the corner of a sample with a few household items. What they do require is knowing what a good result looks like, because the whole point of a low-grade slab is to pass a quick glance. I will walk through each check, and I will give you the numbers so you are not guessing.
Why Cheap Quartz Fails Quietly
Engineered quartz is mostly crushed natural quartz - the mineral is silicon dioxide, or SiO2 - bound together with a resin, usually polyester, plus a small amount of pigment. A good slab runs about 90% to 93% quartz by weight, with the remaining 6% to 10% being resin and color. That ratio is not a marketing detail. The quartz is what gives the surface its hardness and stain resistance; the resin is what holds it together and, if it is low-grade, what lets it fail.
Manufacturers who want to cut cost have two main levers. They can reduce the quartz content and replace part of it with calcium carbonate, a cheap filler that is far softer and reacts with acid. Or they can use a weaker, higher-percentage resin that softens under heat and yellows over time. Both substitutions are invisible on the polished face of a finished slab. That is why the checks below matter - they test what is under the surface, not what is printed on the label.
The Acid Test: Catch Calcium Carbonate Filler
This is the first check I run, and it is the one that surprises people most. Calcium carbonate, the filler used to bulk out cheap quartz, reacts with acid. The reaction produces carbon dioxide gas, which shows up as small bubbles on the surface. A real quartz slab, made from silicon dioxide, will not fizz when you put acid on it, because silica does not react with ordinary household acids.
What to Use and How to Run It
The cleanest version uses dilute hydrochloric acid, but most people will not have that at home. Vinegar works too - it sits around pH 2.4 to 2.5 - and so does lemon juice, which is closer to pH 2. Ask the supplier for a small offcut or an edge of a sample you are allowed to test, then apply a few drops and watch for 30 seconds to a minute. On a slab that has been padded with calcium carbonate, you will see a slow fizzing. On genuine quartz, nothing happens.
What a Fizzing Sample Actually Tells You
If the sample fizzes, the stone is not just "a little softer." It means the manufacturer swapped out a meaningful portion of the quartz for filler to lower the bill. That filler is the reason the surface will etch and dull over time, especially anywhere it meets lemon, vinegar, wine, or cleaning products. I treat any fizzing sample as an automatic no. It does not matter how nice the color is.
The Permeability Test: Soy Sauce Tells the Truth
The second check is about how open the surface really is. Quality quartz is dense and nearly non-porous, with water absorption typically under 0.05% and good slabs down around 0.02%. That is why a good countertop does not soak up spills. A cheap slab looks equally polished on top, but its core is looser and more porous, so liquid works its way in and leaves a stain you cannot wipe off.
How to Run the Test
Pour a small pool of soy sauce, dark juice, or strong coffee onto the sample and leave it. Soy sauce is my favorite because it is dark, slightly oily, and unforgiving. Leave it for at least 15 to 30 minutes; if you can, leave it for a full day. On a low-grade slab, the stain will have bled into the surface by the next day and will not come out completely even with cleaner. On a dense slab, you wipe it away and the surface looks the same as before.
Why This Matters More Than It Looks
Porosity is not just about stains. A porous core also means the slab is weaker and more likely to chip at the edges, because the material is not packed as tightly. When I find a slab that fails this test, I usually find it fails the knife test right after. The two problems tend to travel together, because both come from the same shortcut: using less quartz and more of the wrong filler.
The Knife Scratch Test: Check the Real Quartz Content
Quartz rates 7 on the Mohs hardness scale, which puts it above a steel knife blade at roughly 5.5. That gap is what this test leans on. A genuine, high-quartz slab will not show a mark when you drag a steel blade across it; the metal is simply too soft to cut the quartz crystals. A slab that has been diluted with calcium carbonate and soft fillers will show a fine white line, because the blade is now cutting through a material that sits lower on the scale.
How to Do It Without Ruining the Sample
Use the back of a utility knife or a key, not the sharpened edge, and work on an inconspicuous corner or an offcut. Press firmly and draw a short line. If the mark wipes away cleanly and leaves nothing behind, that is what you want. If a visible scratch stays, the surface is too soft. Do not saw back and forth - one firm, controlled stroke tells you everything you need.
What a Clean Result Does Not Mean
A slab that passes the knife test is hard, but hardness alone does not make it good. The acid and permeability checks still matter, because a hard surface can still be porous or padded with filler in the middle. Think of the four checks as a set. Each one catches a different shortcut, so I run all four before I sign off on a material.
The Fire Test: Resin Quality and Heat Resistance
The last check targets the resin. In a low-grade slab, the manufacturer uses more resin and a cheaper grade of it, which lowers the heat tolerance. Polyester resin starts to soften and discolor somewhere around 150°C to 200°C, and a scorch mark is what you get when a flame or a hot pan pushes past that point. A good slab still uses resin - quartz cannot hold together without it - but the amount and the quality are different enough that the surface should take brief contact with heat without leaving a permanent burn.
How to Run the Test
Hold the flame of a lighter against the sample for a few seconds, then look at the spot. A cheap slab will show a yellow or brown scorch mark that does not rub off, because the resin has burned. A quality slab may pick up a light soot mark from the lighter fuel, but that wipes away and the surface itself is unchanged. Keep the contact brief - a few seconds is enough. You are testing the resin, not trying to melt the stone.
What This Means for Real Kitchens
This is the check I care about most for everyday use, because people do set hot pans down, and they do not always reach for a trivet first. A slab that scorches under a lighter will scorch under a skillet. That does not mean quartz can take any heat - I still tell people to use a trivet or a heat pad for anything straight off the stove. It means a good slab forgives the occasional mistake, and a cheap one does not.
The Four Checks at a Glance
Here is the whole routine on one page. Each row is a shortcut manufacturers take, the test that catches it, and what a good and a bad result look like.
| Check | What You Use | Good Quartz Result | Low-Grade Result | What It Reveals |
|---|---|---|---|---|
| Acid test | Vinegar or lemon juice | No reaction, no bubbles | Slow fizzing on the surface | Calcium carbonate filler |
| Permeability test | Soy sauce or dark juice | No stain after 24 hours | Stain bleeds in within a day | Porous, loosely packed core |
| Knife scratch test | Back of a utility knife | No lasting mark | White scratch line stays | Low quartz content, soft fillers |
| Heat test | Lighter flame, a few seconds | Soot wipes away, surface unchanged | Yellow or brown scorch stays | Cheap or high-percentage resin |
Run them in this order, because a sample that fails the acid test usually fails the permeability test too, and the pattern tells you how deep the shortcut goes.
Quartz vs Marble: Why the Tests Differ
People often hold a quartz sample next to a marble sample and try to compare them by eye. The two materials behave so differently that the same checks do not mean the same thing. Marble is calcium carbonate by nature - that is literally what it is - so it will fizz under acid even when it is a perfectly good stone. You cannot use the acid test on marble the way you use it on quartz, because the fizz is not a sign of adulteration; it is the material itself.
Marble is also softer, sitting around 3 on the Mohs scale, which is why it scratches and etches more easily and why it needs sealing to resist stains. None of that makes marble a bad choice - it just means you judge it by different rules. The four checks in this guide are built for engineered quartz, where the whole point is a dense, non-porous, scratch-resistant surface that should not need sealing at all.
Where the Numbers Come From
If you ask a supplier for a spec sheet, a few numbers are worth reading closely. A quality slab should list quartz content at 90% or higher, often 90% to 93%. Water absorption should sit under 0.05%, and many good slabs are around 0.02%. Density for engineered quartz typically runs about 2.3 to 2.5 grams per cubic centimeter, which reflects how tightly the quartz is packed. Standard countertop thicknesses are 12mm, 15mm, 20mm, and 30mm, with the thinner gauges used more for vertical surfaces and the thicker ones for tops that carry weight. Slab sizes are commonly around 3000×1400mm, with jumbo formats near 3200×1600mm.
These numbers are not secrets, but they are rarely printed in the showroom. That is exactly why the four checks matter. You can measure everything that counts - hardness, density, porosity, and resin quality - with a few household items, in less time than it takes to read a warranty.
The Hard-Won Lesson: Test the Edge, Not the Face
The polished face of a slab is the last place a shortcut shows up. A surface sealer or a heavy polish can make a loose, filler-heavy core look dense for months, and by the time the stain or the etch appears, the slab is already installed and paid for. I learned to stop judging the showroom face and start testing the raw edge and the back of the sample instead. That is where the filler shows, where the fizz happens, and where the knife actually bites. The face is the part of the slab that has been dressed up; the edge is the part that has not.
The Lesson: Always test the raw edge and the back of the sample, not the polished face - the polish and any surface treatment are exactly what hide the shortcuts.
What to Check Before You Buy
Before you test anything, ask for the right piece. A good supplier will hand you an offcut or let you mark the edge of a sample without flinching. A supplier who refuses a small scratch test or an acid drop on a corner is telling you something about the material. I also ask for the spec sheet at the same time - quartz content, water absorption, and thickness - so I can line the printed numbers up against what the tests actually show.
When you are ready to order, the same logic applies to the finished quartz countertops you are paying for. Ask which slab your top will be cut from, and if you can, see it before it goes under the saw. The checks only protect you if you run them on the material you are actually buying, not on a display piece that has nothing to do with your order.
Frequently Asked Questions
Do I need hydrochloric acid to run the acid test?
No. Dilute hydrochloric acid is the cleanest option, but vinegar and lemon juice both work well enough to expose calcium carbonate filler. Vinegar sits around pH 2.4 to 2.5, and lemon juice is closer to pH 2. Either will produce a visible fizz on a filler-heavy slab and do nothing on genuine quartz, which is silicon dioxide and does not react with these acids.
How long should I leave the soy sauce on the sample?
Leave it for at least 15 to 30 minutes. A full 24 hours is more decisive. A dense slab will show nothing after a day - you wipe the surface and it looks unchanged. A porous, low-grade slab will have let the stain bleed in by the next morning, and it will not come out completely even with a stone cleaner. The longer window is worth it because a weak surface can look fine at 20 minutes and then fail overnight.
Will the knife test damage a good slab?
No, not if you use the back of a utility knife or a key and one firm, controlled stroke. Quartz sits at 7 on the Mohs scale and a steel blade is around 5.5, so the metal is too soft to mark genuine quartz. A slab that shows a lasting white line is the one that fails, because the blade is cutting through soft filler rather than sliding over quartz. Work on a corner or an offcut and avoid sawing back and forth.
Can a quartz countertop handle a hot pan directly?
It should take brief contact, but I would not treat it as a heat-proof surface. The resin that binds the quartz starts to soften and discolor somewhere around 150°C to 200°C, which is why a cheap slab scorches under a lighter flame. A good slab will shrug off a few seconds of contact, but a pan straight off the stove can still leave a mark, so I always tell people to use a trivet or a heat pad. The fire test is about catching a weak slab, not about skipping that habit.
What should I ask for from the supplier before I test?
Ask for an offcut or an edge you are allowed to mark, plus a spec sheet that lists quartz content, water absorption, density, and thickness. A quality slab should show 90% or more quartz content and water absorption under 0.05%. If the supplier will not let you run a small scratch or acid test, treat that as part of the answer and keep looking. The material you test should be the same batch you are ordering from, not a separate showroom piece.
Final Conclusion
Identifying a good quartz slab is not about trusting a brand name or squinting at a finish under showroom lights. It is about four fast tests that each expose a specific shortcut: fizzing under acid, a stain that bleeds in overnight, a knife line that will not wipe away, and a scorch that stays after a flame. Run them on the raw edge, line them up against the spec sheet, and you will know within a few minutes whether the slab is the real material or a dressed-up copy. That is the standard I hold every slab to, and it is the one KA UNITED works to on every countertop we ship.