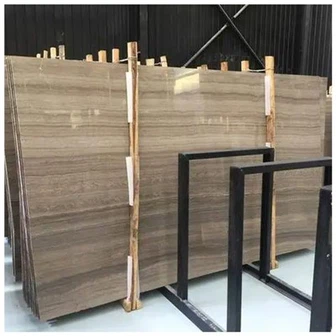
Accessible Hotel Bathroom Vanity package coordination
Accessible Hotel Bathroom Vanity package coordination
On a premium serviced-apartment project, we installed the mockup vanity and rolled a wheelchair toward it. The front approach looked generous until the user's knees met the underside of a deep basin before the chair reached the faucet. The cabinet drawing showed clearance. The sink drawing showed a beautiful bowl. Nobody had placed the bowl inside the clearance envelope.

An accessible hotel bathroom vanity is an assembly, not a cabinet with an accessibility label. Don't ask me how I know: the stone edge, sink depth, trap, drawer box, wall brackets, mirror, and even the soap dispenser can each steal usable space. I want them on one coordinated section before anything enters production.
The wider package starts with bathroom cabinets coordinated with stone vanity tops, but the project architect and accessibility consultant must define the governing code, room type, required clearances, reach ranges, controls, and mounting conditions for the destination. We manufacture to an approved project requirement; we do not guess one global dimension.
Draw the accessible hotel bathroom vanity in section first
Here's what I'd do: start with the user's approach and draw the occupied space below the top. Then place the finished floor, stone top, visible edge, basin, faucet, supply lines, waste, protective covers, brackets, mirror, lighting, and accessories around it. Only after that do I decide what storage remains possible.
The section must use finished dimensions. A thick-looking mitred stone edge may hang lower than the slab thickness suggests. An undermount bowl can project below the top. A decorative apron can reduce front clearance. A wall-hung cabinet can still block a chair if its lower rail or drawer sits inside the approach zone.
For the surface, a project can coordinate repeated sizes through bathroom vanity tops while selecting the exact material, finish, edge, cutout, and backsplash for the room schedule. This is where you don't cheap out: the top drawing and the cabinet drawing need the same revision number.
Put the sink bowl inside the clearance drawing
A plan view does not reveal the full problem. I need the bowl's outer depth, underside profile, waste position, overflow, fixing clips, sealant zone, and any support rail. A shallow-looking basin can have a deep moulded underside. A centred waste can put the trap where knees need to travel.
At breakfast, a guest should be able to approach, wash, and reach the faucet without twisting around the cabinet corner. In the evening, housekeeping should be able to clean around protected plumbing without removing a decorative panel. Those are ordinary scenes. They expose bad coordination quickly.
A floating vanity unit with sink can provide a useful starting form, but its standard drawer and bowl arrangement does not automatically satisfy a project's accessible room. We change the internal layout only after the required approach and services are fixed.
| Coordination checkpoint | What the approved drawing must show | Daily-use failure prevented |
|---|---|---|
| Approach and clearance | Governing local requirement, finished floor, front approach, knee and toe envelope, and room obstacles | A chair reaches the cabinet but not the faucet |
| Vanity top and edge | Finished height, slab gauge, build-up, underside, overhang, corners, cutout, and splash | Decorative edge occupies required space |
| Basin and plumbing | Actual model, underside, waste, supply, trap, insulation, clips, and maintenance access | Knee contact, heat exposure, or inaccessible repair |
| Cabinet and support | Wall structure, brackets, rails, drawer travel, storage, hardware, and load path | Sagging top or drawer collision |
| Mirror and controls | Reflective range, tilt where specified, faucet reach, lighting, outlets, dispenser, and accessory positions | A guest can use the sink but not the mirror or controls |
The Hard-Won Lesson: The stone apron removed the last 38 mm
A hotel mockup met the scheduled vanity height, and the cabinet supplier left the requested open bay. Then the stone fabricator added a deeper mitred apron to make the top look more substantial. The return dropped 38 mm below the approved underside line. A wheelchair user's knees touched the edge during the physical test, and the mirror view also shifted because the guest could not approach fully. We rebuilt one mockup instead of repeating the detail across 46 accessible rooms.
The Lesson: Freeze the finished underside envelope, not just the top surface height, before approving any decorative edge.
Coordinate cabinet storage without stealing access
Accessible rooms still need storage. The trick is putting it where it does not compete with approach, plumbing, or reach. Side drawers, a separate tower, an adjacent open shelf, or a split cabinet can work when the room plan supports them. I do not force a standard central drawer beneath a sink just because the other guestrooms use one.
Here's what I'd do: keep the accessible bay clear and move daily-use storage to a reachable side zone. Then test the drawer fully open with the chair in position, the bathroom door moving, and another person passing behind. A drawer that opens on paper can be a pain in the neck when it traps the guest inside a narrow circulation path.

The Complete Guide to Bathroom Vanity Top and Cabinet Packages for Hotels and Residences sets the package logic. An accessible room uses the same principle with stricter coordination: cabinet, top, sink, faucet, mirror, hardware, wall, and room code stay together.
For repeated surfaces, quartz vanity tops can support controlled colour and standardized openings, but the project still needs the exact sink template, edge, support, and room-specific clearance approval. Material consistency cannot correct geometry.
Protect plumbing without closing the knee space
Guests should not contact hot or sharp plumbing. The project plumbing and accessibility teams define the required protection. I coordinate covers, insulation, waste route, service access, and cabinet clearance on the section. A bulky after-market cover can occupy the very space it was meant to make safer.
Housekeeping also needs to wipe the underside and floor without catching a cloth on brackets or exposed fixings. When water splashes behind a poorly sealed backsplash, mould may appear months later. Don't ask me how I know. Detail the splash, wall junction, and service penetrations while the mockup is open.
Test the mirror, faucet, lighting, and accessories from the user's position
A mirror that looks balanced in the elevation may start too high for a seated guest. We test the reflective range from relevant positions and coordinate the mirror cabinet, sconces, sensor, demister, outlets, and splash. If a tilting mirror is specified, confirm its hardware and the clearance behind it.
Morning light matters. A guest shaving or applying makeup needs useful illumination on the face, not a bright downlight creating shadows under the eyes. At night, the route to the sink should be understandable without flooding the room. The NKBA 2026 Bath Trends reporting points toward integrated and mood lighting; our job is to make those layers work with the mirror and cabinet, not merely add more fixtures.
This is where you don't cheap out: build the full mockup with working lighting and the actual mirror. Switch on the demister, open the cabinet, run the faucet, fill the basin, and watch where water lands. Thank goodness we test, because a sensor hidden behind the stone splash is expensive to relocate after tiling.
Accessories need the same care. Soap, tissues, towels, hair tools, waste bins, and emergency controls cannot crowd the approach or exceed the project's required reach. Place them in the room mockup and ask the accessibility consultant to sign the final arrangement.
Repeat the approved room without losing its details
After mockup approval, I create a room-type package. It contains the governing requirement, cabinet and top drawings, sink and faucet models, plumbing section, support detail, mirror and lighting layout, accessory schedule, finish sample, inspection points, labels, and installation photographs.
Every accessible room gets the correct room code. Similar-looking standard vanities must not enter those crates. We distinguish cabinet, stone, sink, mirror, brackets, and hardware on the packing list so the site does not discover a swap after the wall is drilled.
Hotel Bathroom Cabinet and Vanity Top Packages explains the room-by-room coordination path. For accessible rooms, I add signed clearance checks and full-scale user testing before production release.
A first installed room receives another check before the remaining rooms move forward. We measure the finished floor relation, approach, underside, bowl, plumbing protection, mirror, controls, drawer movement, and door circulation. Here's what I'd do: keep that room closed for one extra inspection rather than opening forty rooms with the same hidden problem.
Understanding accessible vanity packages in today's market
Why hotel influence and aging-in-place belong in the same conversation
NKBA's 2026 bathroom reporting connects hotel and resort influence with wellness, organization, technology, and aging-in-place. A good project turns those ideas into dignity and easy daily use. The vanity should feel like part of the room, not a medical afterthought.
How to make one package attractive and usable
Start with the user's space and governing rules. Then select the sink, stone edge, cabinet form, mirror, lighting, and storage around that envelope. Consistent finishes can match other rooms while the internal geometry remains purpose-built.
What to do when a clearance problem appears on site
First photograph the complete vanity, room code, measuring evidence, underside, plumbing, mirror, and affected approach. Second stop installation or alteration in repeated rooms. Third contact the supplier and project accessibility team with the approved mockup, drawings, inspection photographs, and room schedule for comparison. Do not grind the stone or move brackets before the conflict is understood.
Frequently asked questions
1. What makes an accessible hotel bathroom vanity usable?
It coordinates the required approach and clearances with the finished top, sink underside, protected plumbing, cabinet, support, faucet, mirror, lighting, controls, and accessories under the project's governing rules.
2. Can an accessible vanity include cabinet storage?
Yes. Place storage outside the required approach and service zones, then test drawer and door movement with the room circulation and actual plumbing.
3. Which vanity top material should a hotel use?
Select material according to maintenance, colour control, finish, edge, sink detail, project standards, and expected use. Geometry and support remain necessary for every surface.
4. Why is a full-scale bathroom mockup necessary?
It reveals conflicts among the user's approach, basin, trap, stone underside, cabinet, mirror, lighting, accessories, and doors that separate drawings often hide.
5. Who approves the final accessibility dimensions?
The project architect, accessibility consultant, and other responsible local professionals define and approve compliance. The supplier manufactures from that signed project information.
Quick-Reference Accessible Vanity Checklist
- Confirm the governing local accessibility requirements with the responsible project professional.
- Draw the finished knee and toe envelope around the actual sink and protected plumbing.
- Freeze the stone underside, edge build-up, support, and backsplash on one section.
- Test mirror view, faucet reach, controls, lighting, accessories, and storage at full scale.
- Label every cabinet, top, sink, mirror, and hardware package by accessible room code.
- Inspect the first completed room before repeating installation across the project.
Final Conclusion
An accessible hotel bathroom vanity succeeds when the user's space controls the sink, stone edge, cabinet, support, plumbing, mirror, lighting, storage, and accessories. Get the responsible local professionals to approve the full mockup, then protect that room type through production and installation. This is where you don't cheap out; KA UNITED would rather rebuild one vanity section now than repeat one painful clearance mistake across an entire hotel floor.

References
2026 Bath Trends Report Press Release, National Kitchen & Bath Association.
Bathrooms Are Getting Bigger, Brighter, and Better Organized, National Kitchen & Bath Association.
Bathroom Planning Guidelines, National Kitchen & Bath Association.
2010 ADA Standards for Accessible Design, United States Department of Justice.
ISO 21542 Building Construction: Accessibility and Usability of the Built Environment, International Organization for Standardization.
Dimension Stone Design Manual, Natural Stone Institute.
TCNA Handbook for Ceramic, Glass, and Stone Tile Installation, Tile Council of North America.