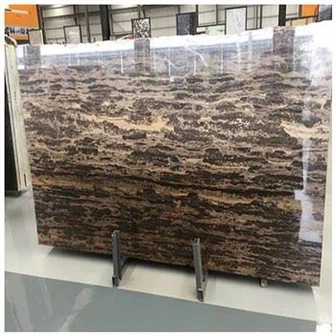
How to install marble on the wall? Natural marble dry hanging technology!
Why Marble Walls Are Hung, Not Pasted
I have walked onto enough job sites to know the moment a marble wall goes wrong. It is usually the same story: someone treated the stone like a big ceramic tile, mixed up a batch of cement mortar, and pressed the slab into place. Within a few months the veins have turned brown, the corners have lifted, and the client is asking why the expensive feature wall looks tired. The answer, almost every time, is that marble is not tile.
There are two reasons a marble wall has to be installed differently. The first is weight. A natural stone panel in the thicknesses we normally use for wall cladding is far heavier than a porcelain tile of the same face area, and once you stack several square meters of it vertically, the load becomes something no adhesive bed is meant to carry on its own. The second reason is chemistry. Marble is porous and reactive, and cement mortar will wick moisture and alkaline salts straight into the stone. That is where rust stains and yellowing come from, and once they are in, they are a genuine pain to remove.
So the correct method is dry hanging. The stone is not glued flat against the wall. Instead, it is carried by a steel subframe and held with stainless steel connectors, with the panel sitting slightly off the substrate so air can move behind it and moisture can drain. It is more work up front, but it is the only way I have seen a marble wall stay flat and clean for years rather than weeks.
What follows is the process I use and recommend, explained in the order the work actually happens. I have written it for anyone who is about to hang a marble feature wall, a lobby elevation, or a fireplace surround, and I have kept the numbers specific because the numbers are what keep the job safe.
Preparation Before the First Panel Goes Up
Nothing about dry hanging is forgiving if the preparation is rushed. The stone, the site, and the layout all have to be sorted before a single bracket is fixed to the wall. I always treat the first two steps as the foundation of the whole installation.
Dry-Laying and Numbering the Slabs
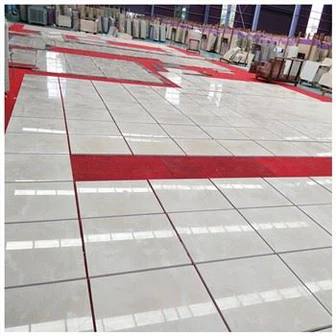
Before any drilling, the stone itself has to be arranged the way the design drawings ask for it. I lay the panels out flat, in the exact order they will appear on the wall, and I make sure the veining runs in one continuous direction. Marble is a natural material, and two panels cut from different blocks can carry their veins at very different angles. If you do not check this before you hang them, you will notice the mismatch from across the room after it is far too late to fix it.
Once the layout looks right, I number every panel in sequence and mark which end faces up. The numbering is what lets the installation crew grab the correct slab at the correct moment, and it is what protects the vein match when the panels leave the staging area and travel to the wall. Skipping this step is how two panels that looked perfect on the ground end up swapped on the elevation.
Site and Foundation Conditions
The storage conditions matter more than most people expect. Marble is porous, so I keep the panels in a dry part of the site. If the material sits in a damp corner or on wet ground, water vapor gets pulled into the stone and can cause staining before the wall is even built. I also keep the stone away from bare steel, iron, and other metal stock. When metal dust or rust particles settle onto a porous surface, or when the two sit in contact in a humid room, the corrosion can transfer into the stone and show up later as rust. Keeping marble and metal separated at the staging area is a cheap habit that prevents an expensive problem.
The Dry-Hanging Sequence, Step by Step
The actual hanging follows a strict order. Each step sets up the next one, and the whole thing is built from the bottom course upward so that the weight of every panel has support beneath it. I will walk through the sequence in the same order the work is done on site.
Cleaning and Marking the Structure
The first move is to clean the face of the structure and snap the vertical layout lines onto it. These lines are the reference for everything that follows, so they need to be sharp and accurate. I mark the overall verticals and the horizontal position lines before any hole is drilled.
Corner Wires and Control Lines
At the large corners, I hang two vertical steel wires to act as the plumb reference for the whole elevation. The proper way to establish the vertical control line is with a theodolite, and I like to snap the line about 20 centimeters away from the big corner rather than right on it. That offset gives the installer a line they can actually sight at any point during the job, so the vertical reference stays checkable instead of disappearing behind the first panel. The upper and lower marks of the control line are recorded, and the line is used to confirm the elevation is running true as the courses go up.
Drilling, Back-Gluing, and Reinforcing
With the reference lines in place, the panels themselves are prepared. Holes are drilled into the stone at the connection points, and adhesive is brushed onto the back face. I also have the fabricator bond a flexible reinforcing material onto the back of each slab. That backing does two jobs: it adds a little structural insurance to a natural material that can have hidden micro-fissures, and it gives the panel a cleaner surface to sit against the frame. The horizontal position lines are marked out so each course lands exactly where the layout drawing says it should.
Brackets and the Bottom Course
The bottom course carries more responsibility than any other, because every panel above it rests on the support beneath. I set the bottom decorative panel bracket first, supporting the prearranged bottom slab against the upper flat line. The bracket has to be solid and either tied into the neighboring supports or connected back to the frame. Once the support is in place, I nail a full-length board along the direction of the support. I use a board about 50 millimeters thick, and the critical detail is that its upper edge sits on the same horizontal plane across the whole length. That single flat edge is what keeps the top and bottom of the bottom course on one level line, and if it is out by even a small amount, that error walks straight up the wall.
Pouring the Base, Fasteners, and Upper Panels
With the bottom panel positioned, adjusted, and temporarily fixed, I pour the M20 cement base to lock the bottom course in and set the drainage pipes so any moisture that does collect behind the stone has a way out. From there the upper courses follow the same rhythm: drill into the structure, insert the fixing bolts, fit the stainless steel fasteners, and pour adhesive into the lower holes of the panel being hung. Connecting steel pins are inserted to bridge the panels, adhesive is poured into the upper layer, and the upper wall panel is temporarily fixed into the lower panel's holes before the expansion bolts are drilled and set and the stainless fasteners are fitted. The top panel closes the run, and the pattern repeats until the elevation is complete.
Leveling and Final Adjustment
The last pass is the one that turns a hung wall into a flat wall. After a panel is temporarily fixed, I check the level and the plumb. Where the surface is uneven, a pair of thin double copper wire pads can be placed on the flat steel plate at the bottom of the panel to bring it up. The perpendicularity is corrected by adjusting the gap between the stainless steel connector at the top of the panel and the wall, and I keep working that adjustment until the panel reads vertical in both directions. Every panel gets this check before the next one goes up, because a small error at course two becomes a large, visible one at course eight.
Key Measurements at a Glance
I keep a short list of numbers in front of me on every dry-hanging job, because these are the values that get repeated constantly and that quietly decide whether the wall is right. The table below is the version I hand to the crew before we start.
| Item | Typical value | Why it matters |
|---|---|---|
| Offset of the control line from the big corner | About 20 cm | Keeps the plumb reference sightable while panels are going up |
| Vertical reference wires at large corners | 2 wires | Establishes a true vertical for the whole elevation |
| Full-length board thickness under the bottom course | 50 mm | Provides one continuous flat edge so the first course starts level |
| Base grout for the bottom course | M20 cement | Locks the bottom panel and carries the load above it |
| Bonding adhesive | Two-part (AB) adhesive | Holds panel to connector with strength plus a fast, predictable set |
| Typical cladding panel thickness | 18 to 20 mm | Balances weight, handling, and stiffness for vertical work |
| Marble density | About 2.7 g per cubic cm | Explains why the wall needs a steel subframe, not adhesive alone |
| Load carried per square meter of panel | Roughly 50 to 70 kg | Determines bracket size, fastener spacing, and anchor depth |
| Finished joint width between panels | 1 to 3 mm | Keeps seams tight and clean without forcing the panels together |
These are the working values I rely on, not fixed law for every project. The design drawings and the engineer's calc always take priority, especially on tall elevations or exterior walls where wind load and thermal movement change the numbers. But for the interior feature walls most people ask about, this list covers the decisions that come up every day.
Mistakes That Cause Cracks, Stains, and Rust
Most of the failures I get called in to fix come from the same short list of avoidable errors. The first is treating the panels like tile and trying to bond them flat to the wall with a wet mortar bed. It is the fastest way to get rust, yellowing, and a wall that is starting to come loose. The second is skipping the dry layout, which turns a beautiful vein pattern into a jumbled mess. The third is letting moisture sit against the stone at any stage, whether in storage, behind the panel, or in a grout bed that has nowhere to drain.
Another common slip is connecting the stone with ferrous metal. Mild steel connectors look fine on the first day, but rust does not stay on the metal. It migrates, and on a porous light-colored marble it migrates straight through the surface. Every connector, bolt, and pin that touches the stone or sits in its holes should be stainless steel. The small extra cost is nothing next to the cost of pulling a stained panel off a finished wall.
Bonding and Waterproofing After Hanging
The dry-hanging assembly is normally bonded with a two-part adhesive, the AB glue I mentioned earlier. It is strong and sets predictably, which is exactly what you want when you are working upward against gravity. But it is not a moisture barrier, and that matters more than people assume.
Even a properly hung wall should get a waterproofing treatment, and a water-based sealer is usually the right call. The reason is simple: adhesive has a small but real chance of penetrating into the stone as it is applied, and absorbed adhesive is one of the classic causes of a panel slowly darkening or blotching after installation. A water-based waterproofing step before and after the bonding work is cheap insurance against that. It will not turn the marble into a sealed, nonporous surface, but it will slow the absorption enough to keep the finish clean while the wall settles.
After the panels are bonded and sealed, the joints are cleaned out and the seams are treated so the finished wall reads as one continuous surface rather than a row of separate stones. The goal at the end of the job is a wall that is flat, plumb, dry, and ready to live with for a long time.
Frequently Asked Questions
Why can't marble be installed with cement mortar like tile?
Marble is much heavier than tile, so a mortar bed cannot carry the vertical load safely, and it is also porous and reactive. Cement mortar wicks moisture and alkaline salts into the stone, which is exactly what causes the rust stains and yellowing you see on poorly installed marble walls.
What is dry hanging?
Dry hanging is a method where the marble panel is carried by a steel subframe and held with stainless steel connectors rather than glued flat to the wall. The panel sits slightly off the substrate so air can circulate and moisture can drain, which keeps the stone stable and clean over the long term.
Why do the panels need to be numbered during preparation?
Numbering locks in the layout you approved during dry-laying. Marble veining has a direction, and once you arrange the panels so the veins flow the way you want, numbering each one in sequence is what makes sure the installers pick the right slab at the right moment and the vein match survives the trip to the wall.
How far from the corner should the control line be set?
I snap the vertical control line about 20 centimeters away from the big corner rather than right on it. That small offset keeps the reference line visible while the panels go up, so the installer can check the plumb at any point instead of losing the line behind the first course.
Why is waterproofing needed after dry hanging?
Even though dry hanging keeps the stone off a wet mortar bed, the two-part adhesive has a real chance of penetrating into the stone as it is applied, which can darken or blotch the panel. A water-based waterproofing treatment slows that absorption and helps keep the finished wall clean and even.
Final Conclusion
Installing marble on a wall is not a bigger version of tiling. It is its own trade, with its own rules about weight, moisture, metal, and order of work. When the slabs are dry-laid and numbered, the control lines are set off the corner and checked with a theodolite, the bottom course starts on a true 50-millimeter board, every connector is stainless steel, and the whole assembly is bonded and waterproofed with care, the wall will stay flat and clean for as long as the building stands. Get any one of those steps wrong and the stone will tell you about it in brown and yellow. Take the time to do the preparation and the sequence properly, and a marble wall becomes one of the quietest, longest-lasting surfaces you can put in a room. For anyone sourcing the panels themselves, the quality of the slab you start with decides how good the finished wall can be, so it is worth choosing your marble carefully from a supplier that understands dry hanging, like KA UNITED.