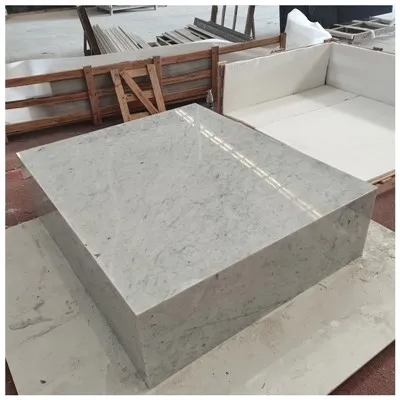
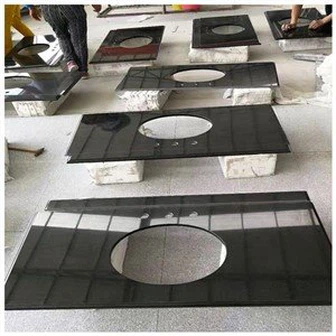
Integrated Sink Repair Or Full Vanity Top Replacement
Integrated Sink Repair: When the Basin Can Be Saved and When the Top Must Go
The first photograph shows a pale chip near the front corner. The second shows a dark line running from the bowl wall toward the drain. They are both described as "sink damage," but they do not belong in the same repair decision. One may be mostly visual. The other sits inside the water path and can move every time the basin is used.

I never approve integrated sink repair from one close-up. I need the entire top, the underside, the cabinet support, the drain area, and the room condition. I also need to know whether the line is stable, wet, stained, recently formed, or connected to an impact.
My rule is simple: repair only when the method restores the required use without hiding uncertainty. If the bowl leaks, the crack moves, support has failed, or the repaired surface cannot be cleaned safely, replace the component. A pretty photograph after polishing is not a service record.
Table of Contents
- Classify the damage before treatment
- When a local repair may work
- When replacement is safer
- Build a service and spare-parts plan
- Questions about repair and replacement
Start Integrated Sink Repair with Damage Triage
An integrated basin can be formed, moulded, assembled, or fabricated as part of the top, depending on material and design. It still performs the everyday function of a sink: holding and draining water while remaining cleanable. Damage inside that water path deserves stricter attention than a mark on a hidden rear edge.
Map the location
I divide the top into zones: outer perimeter, counter field, bowl rim, bowl wall, bowl bottom, outlet, overflow, bonded seam, underside, and support contact. The same 20 mm chip has different consequences in each zone.
The service ticket for integrated sink repair should name one of those zones instead of saying "damaged sink." Location tells the specialist what photographs, access, moisture checks, and replacement implications matter. It also lets an operator see whether similar damage is repeating around one support or fitting detail.
A chip on an exposed outer corner may be visible and sharp but stay dry. A chip at the drain can interrupt the seal, collect soil, and remain wet. A line over a cabinet rail may indicate pressure from uneven support. Location begins the diagnosis.
Record the condition before cleaning
Photograph the entire vanity and the damage under room light. Add a scale, label, and views from more than one angle. Photograph the underside and cabinet. If moisture is present, record it before drying. Do not grind away evidence before the cause is understood.
The Hotel Vanity Cleaning Protocol matters because harsh chemicals, abrasives, standing moisture, and neglected sealant can alter the surface around a repair. Maintenance history does not automatically assign blame, but it helps separate impact, chemical change, water entry, and support movement.
Check whether the damage moves
A static surface mark and an active crack are different problems. The responsible specialist may use suitable inspection methods, repeated photographs, tapping, moisture checks, or controlled loading appropriate to the material. I do not tell a hotel team to push on a damaged bowl to see what happens.
| Observed condition | First question | Possible route | Immediate hold |
|---|---|---|---|
| Small outer-edge chip | Is the edge stable and outside the water path? | Local fill, shaping, and polish match | Sharp edge or growing loss |
| Bowl-surface chip | Can repair remain cleanable under water? | Specialist repair after material test | Loose material, leakage, rough cavity |
| Line from drain | Is it a crack, joint, vein, or repair? | Diagnosis before any cosmetic work | Movement, moisture, failed seal |
| Failed bonded corner | Did adhesion or support fail? | Workshop rebuild or replacement | Open joint or displaced piece |
| Underside crack over rail | Is load concentrated at support? | Support correction plus specialist decision | Active movement or unsafe support |
When a Local Repair May Be Reasonable
The damage is stable and accessible
A local repair has a better chance when the damaged area is small, dry, stable, reachable, and outside a highly stressed zone. The repair specialist also needs enough material around it to prepare the surface without enlarging the problem.
Before approving integrated sink repair, I ask how the area looks both wet and dry. Water can deepen a natural vein, darken filler, and expose a boundary that disappears when dry. A hotel room cannot judge acceptance from one polished photograph taken under a work lamp.
On an integrated quartzite sink, natural veins, resin, reinforcement, and mineral variation affect how a repair reads. Color matching is not just mixing white paste. Transparency, grain, polish, and viewing light all matter.
A white crystal quartz integrated sink can present another repair problem: a small color or sheen mismatch may remain obvious against a quieter field. The specialist still has to test bonding, cure, cleanability, and water exposure rather than promising that uniform color makes every repair disappear.
The repair can remain cleanable
Inside the bowl, a repair should not leave a sharp ridge, open pocket, or rough boundary that traps residue. The proposed material must be appropriate for the service condition, and its use should follow the repair-system manufacturer's instructions. I also want the cleaning team to understand any restrictions.

A successful color match on day one does not prove long-term behavior. Water, cleaners, light, and repeated wiping may make the repair more visible. Set the acceptance distance and light before work begins, then keep the approved sample or photograph.
Support and cause are corrected first
Repairing a crack without correcting uneven support is wasted work. Check cabinet level, rail contact, bracket position, wall restraint, cut geometry, plumbing contact, and any impact source. The active parent, Integrated Sink Vanity Top: Bowl Geometry, Drainage, Support, and Replacement, connects those conditions as one package.
When the Whole Vanity Top Should Be Replaced
I lean toward replacement when water integrity, structural confidence, hygiene, or future service remains uncertain. That does not mean every visible vein is a defect. It means the observed damage and evidence no longer support a reliable local remedy.
The crack is active or crosses a critical zone
A moving crack through the bowl bottom, drain opening, narrow front strip, bonded corner, or support transition needs specialist assessment. If movement continues, cosmetic filling can hide the line without restoring the assembly.
Repeated damage changes the integrated sink repair decision. If several rooms show lines in the same location, I stop treating them as isolated chips. Compare top drawings, support contact, drain tightening, handling, installation sequence, and room conditions. The pattern may point to a package detail that needs correction before more replacements are installed.
Leakage is a clear hold condition. Stop using the basin, isolate water as appropriate, protect the cabinet, and document the path. Thank goodness a spare top is easier to install than a swollen cabinet, damaged wall finish, and mould concern behind the unit.
The repair would remain visibly unacceptable
A high-contrast stone, translucent edge, uniform solid-color surface, or direct mirror light can expose every repair boundary. A technically stable repair may still fail the agreed visual standard in a premium room. Set that standard before authorizing the work.
The damaged area cannot be serviced safely
Some bowl joints, underside channels, and concealed reinforcements cannot be repaired properly in the room. Removing the top for workshop work may cost nearly as much time as replacement while still leaving uncertainty. Compare access, transport, cure time, reinstallation, sealant, plumbing, and room downtime.
The published Bathroom Vanity Top Replacement guide covers protecting cabinets and wall finishes during removal. For an integrated basin, replacement also changes the sink and counter together, so templates and drain alignment must be checked again.
The Hard-Won Lesson: A polished repair can hide a wet crack
A fine line beside the outlet is filled and polished until it nearly disappears from above. The underside remains damp after the basin is drained. The repair improved appearance but did not establish whether the water path, seal, or crack had been restored. Reopening the cabinet later costs more room time than the original inspection would have required.
The Lesson: Do not approve a basin repair until the underside stays dry through a recorded fill, hold, drain, and repeat test.
Design the Repair Decision before Rooms Open
Keep production records
Save the top drawing, basin geometry, material code, finish, color range, repair disclosures, support detail, drain model, cabinet revision, and room allocation. When a problem appears, those records tell maintenance what the assembly was supposed to be.
A proper integrated sink repair record adds the date, room, damage map, cause assessment, method, materials, cure condition, technician, photographs, water test, and final acceptance. That history matters when a later mark appears nearby. It prevents the next team from mistaking an old repair boundary for a new crack.
Plan spare material and templates
Repeated projects benefit from controlled spare stock or an agreed replacement route. Natural stone varies, so a later slab may not match the original room. Engineered or moulded surfaces may also change by batch. Record templates and reference samples while production information is current.
Spare planning supports integrated sink repair even when the first choice is local work. The operator knows a replacement exists if the repair fails its water test or visual acceptance. Without that fallback, pressure to keep a room open can turn a doubtful temporary patch into a permanent decision.
I also check whether a spare top can reach the room. Door width, lift size, corridor turns, fixing sequence, backsplash, mirror, faucet, and cabinet attachment all affect replacement. A spare that cannot pass the doorway is not a useful spare.
Decide who authorizes what
Housekeeping should report damage, not choose repair chemistry. Maintenance can isolate water and document conditions. A qualified specialist assesses the material and method. The project or operator approves visual acceptance and room downtime. Clear roles stop an innocent cleaner from turning a small chip into a larger ground patch.
The authorization limit for integrated sink repair should be written before an incident. Maintenance may approve a minor edge make-safe action, while bowl cracks, drain damage, structural movement, and visible premium-room repairs move to specialist and operator review. That escalation path protects staff from having to invent policy beside a leaking vanity.
Room downtime needs a realistic sequence. Isolate the basin, protect the cabinet, remove fittings where required, complete the work, allow the specified cure, reconnect plumbing, test water, inspect the underside, clean the room, and record acceptance. Skipping cure or water testing only moves the risk from maintenance time into guest time.
I also define what happens to a removed top. Keep it long enough for cause review when the damage pattern may affect other rooms. Photograph support marks, underside moisture, fitting pressure, and concealed repairs after removal. Those observations can improve the next replacement detail instead of disappearing with the discarded component.
Update the room asset record after replacement, including the new material batch, drain model, support adjustment, sealant date, and completed water test.
Keep that record with handover.
I keep one copy with my replacement template.
Escalate with the original evidence
When damage is found, photograph the whole vanity, close condition, underside, support, fittings, room number, and label. Stop using or altering the basin if leakage or movement is suspected. Send the supplier the images with original inspection, installation, and water-test records so the decision begins from evidence.
Quick-Reference Checklist for Basin Damage
- Photograph the complete vanity before cleaning or grinding the damage.
- Map the condition by bowl, drain, edge, joint, underside, and support zone.
- Stop basin use when leakage, movement, or sharp loose material appears.
- Identify the material, finish, repair history, and cleaning products.
- Correct support or plumbing contact before authorizing cosmetic work.
- Test water integrity and cleanability after any approved repair.
- Retain templates, samples, room records, and a replacement access plan.
Frequently Asked Questions
1. Can a chipped integrated sink be repaired?
A small stable chip may accept local repair when the material and repair system are suitable, the area remains accessible, and the finished surface can be safe and cleanable. Damage at the drain, bowl bottom, bonded joint, or support transition needs stricter assessment.
2. Will a repair become invisible?
Not always. Natural veins, translucent areas, solid colors, polish, direct light, and water can reveal a repair. Agree on viewing distance, lighting, color tolerance, sheen, and acceptable boundary before work. A stable repair and an invisible repair are different promises.
3. Does a hairline mark mean the basin is cracked?
It may be a natural vein, surface scratch, fabrication joint, old repair, or crack. Do not diagnose from one image. Record the top and underside, moisture, movement, location, and history, then obtain material-specific assessment before treatment.
4. When should integrated sink repair be rejected?
Reject or pause the repair route when leakage, active movement, failed support, unsafe sharp material, inaccessible damage, uncertain bonding, poor cleanability, or unacceptable visual impact remains. Replacement may offer a more reliable service outcome.
5. What should hotel staff do when basin damage appears?
Identify the room and stop use if leakage or movement is suspected. Photograph the whole vanity, close damage, underside, cabinet, fittings, and label. Do not apply filler or aggressive cleaner. Send the record to maintenance, the supplier, and the responsible specialist for comparison with original documents.
Final Conclusion
Integrated sink repair begins with cause, location, material, support, water exposure, and service access. A small stable edge chip may accept careful local work. A leaking or moving crack, failed bowl joint, or uncertain drain area may make full replacement the more responsible decision. Here's what I'd do: document first, stop water when needed, correct the cause, and test the result. KA UNITED would rather replace one doubtful basin than return a room to service with a polished line hiding the same unresolved problem.
References
- Dimension Stone Design Manual, Natural Stone Institute.
- Care and Cleaning of Natural Stone, Natural Stone Institute.
- Bathroom Planning Guidelines, National Kitchen and Bath Association.
- ASTM C503 Standard Specification for Marble Dimension Stone, ASTM International.
- ASTM C616 Standard Specification for Quartz-Based Dimension Stone, ASTM International.
- Manufacturer Instructions for Approved Surface Repair Systems.
- Manufacturer Instructions for Drain, Sealant, and Plumbing Components.
- Search Essentials and Helpful Content Guidance, Google Search Central.