Integrated Sink Vanity Top Dimensions For Hotel And Multi-Unit Bathrooms
Integrated Sink Vanity Top Dimensions That Keep the Bowl, Cabinet, and Wall Working Together
A vanity top can match its stated width and still be wrong. I see the conflict when the bowl sits neatly in the drawing, but the rear deck leaves no comfortable faucet clearance, the front rail becomes too narrow, or the cabinet partition lands under the drain. The pieces did not move by themselves. Different teams simply dimensioned from different points.

My first answer on integrated sink vanity top dimensions is to establish one coordinate system before anyone debates millimeters. The top drawing, cabinet drawing, plumbing rough-in, backsplash detail, and room-type schedule must use the same finished wall references. If one file measures from cabinet center and another measures from finished top center, both can look internally correct while the built assembly misses.
Table of Contents
- Build one dimension chain
- Set the bowl and rear deck
- Protect the front rail and side lands
- Coordinate the cabinet and room types
- Prove the drawing on one working unit
- Questions before production
Build Integrated Sink Vanity Top Dimensions from One Origin
I begin with the finished room, not the isolated top. The drawing must identify the finished left wall, finished right wall, rear wall plane, finished floor level, and cabinet installation line. Those references tell us where wall scribes, side gaps, backsplash thickness, overhangs, and service clearances belong.
The top then receives a controlled overall width and depth. After that, I dimension the bowl center, drain center, faucet center, overflow route, rear deck, front rail, side lands, and visible overhangs from the same origin. Chain dimensions can support fabrication, but a second overall check must confirm that rounding or accumulated dimensions have not changed the final size.
For repeated rooms, I do not accept a note saying "mirror for opposite hand" unless the entire assembly genuinely mirrors. Shutoff valves, drawer boxes, power outlets, wall lights, door swings, and housekeeping access may not reverse with the cabinet. A left-hand room and right-hand room deserve separate identifiers when the interfaces differ.
| Dimension group | Drawing must identify | Physical check | Typical conflict |
|---|---|---|---|
| Room envelope | Finished walls, floor level, side tolerance and backsplash plane | Measure the actual mock-up bay after finishes | A nominal wall width hides plaster or tile variation |
| Bowl geometry | Rim, floor, outlet, overflow and transition radii | Fill, drain and wipe the finished basin | A deep visual bowl reduces cabinet service space |
| Rear deck | Faucet hole, spout axis, wall clearance and cleaning path | Install the specified faucet and operate it | Handle or escutcheon contacts the wall |
| Front and sides | Front rail, side lands, edge profile and overhang | Inspect edge support and hand contact | The bowl consumes material needed around the edge |
| Cabinet interface | Rails, partitions, drawer envelopes and removable access | Open every drawer with trap and valves fitted | A structural rail blocks the waste fitting |
There is no responsible universal number for every row in that table. Material, fabrication method, bowl form, top thickness, cabinet construction, support, faucet model, code obligations, and room use change the answer. I want the responsible fabricator, cabinet designer, plumbing team, and project designer to sign off on the same revision rather than borrow a dimension from a different basin.
The release sheet for integrated sink vanity top dimensions should also state which values control fabrication and which values require site verification. That distinction prevents a factory tolerance from being mistaken for permission to ignore a measured wall condition.
Set the Bowl before the Rear Deck Becomes a Leftover
The bowl is not only a hollow area. Its wall angle, floor slope, corner radius, outlet recess, overflow channel, and underside construction occupy space in different directions. A plan view hides much of that volume. I ask for at least one transverse section and one longitudinal section through the actual basin.
With integrated sink vanity top dimensions, the rear deck must be designed around the specified faucet rather than a generic hole symbol. The base diameter, escutcheon, handle sweep, cartridge access, spout projection, supply connection, and distance from the wall all matter. A comfortable-looking deck in a rendering can become a narrow strip that nobody can wipe behind.
The front edge needs equal attention. People place wet hands, toiletries, and cleaning cloths there. If the bowl moves forward to solve faucet clearance, the front rail may lose visual weight or practical strength. I ask the fabricator to identify the minimum permitted material around the basin for the chosen construction and support, then I judge whether that amount also feels right in use.
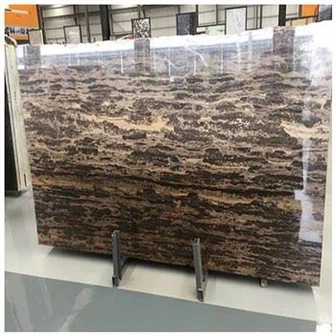
A quartzite integrated sink makes mineral movement part of the bowl composition. That visual advantage increases the importance of the cut map, because a hard vein boundary, repaired zone, or abrupt color change may land at a curve or narrow bridge. The full slab and the basin drawing have to be read together.
Engineered surfaces change the fabrication discussion but do not remove it. A white crystal quartz integrated sink still needs approved joint construction, bowl radii, support, drainage, and cleaning tests. I never let a consistent color become an excuse for a vague section drawing.
Protect the Front Rail, Side Lands, and Visible Overhangs
The side land is often where several tolerances gather. The bowl needs room. The top needs a side return or wall allowance. The cabinet side panel and filler need their own positions. A door casing or towel accessory may sit nearby. When those conditions are dimensioned independently, the visible strip beside the bowl can change from room to room.
I use integrated sink vanity top dimensions to define what guests will actually see after installation. That includes the exposed overhang, the apparent alignment to cabinet doors, and the line between bowl center and mirror or wall light. A factory can hold a fabrication dimension perfectly and still produce a crooked-looking room if the cabinet or mirror uses another centerline.
Edge profiles also consume geometry. A built-up edge, mitered apron, eased edge, or shaped return changes the underside space and the way the top meets a drawer front. The drawing should show the finished edge, not only the nominal slab thickness. I want a section at the front and any place where the profile returns into a wall.
The word sink covers many basin constructions, but the production drawing must name the exact assembly. An integrated bowl, bonded bowl, molded bowl, and carved stone basin can share a similar top view while requiring different joints, support, radii, and repair access.
The Hard-Won Lesson: Never Center the Bowl on an Undefined Top
A top drawing may show the basin centered between two finished edges while the cabinet drawing centers its opening between carcass sides. Add a wall scribe on one side and a larger exposed overhang on the other, and those centers are no longer the same. The drain then approaches a partition, the mirror axis shifts, and the visible side lands become unequal even though every individual component carries a center mark.
The Lesson: Dimension the bowl from one named finished-room origin and carry that origin through the top, cabinet, plumbing, and mirror drawings.

Make the Cabinet and Room Schedule Part of the Same Drawing Set
The cabinet under an integrated bowl is working space. Rails support the top. Partitions organize drawers. A removable panel may protect service access. Trap, valves, supply hoses, overflow tubes, and electrical components compete for the remaining volume. A front elevation alone cannot prove that arrangement.
For integrated sink vanity top dimensions, I overlay the bowl underside and plumbing envelope on the cabinet plan and section. I then open the drawer boxes in the model or mock-up. Drawer clearance must be checked along the whole travel path, not only in the closed position. This is where you do not cheap out on coordination.
The bathroom cabinet route helps establish carcass construction, storage intent, door or drawer arrangement, and finish. The final package still needs one project drawing that joins those choices to the top. Separate brochures cannot release repeated guestrooms.
Room schedules deserve their own discipline. A standard king room, double room, suite, accessible room, and public washroom may use different widths, clear floor areas, plumbing positions, or storage priorities. I give each distinct geometry a type code. If two rooms share the same top but use different cabinets, the schedule says so explicitly.
Accessibility requirements cannot be inferred from a typical room. Knee clearance, reach, pipe protection, faucet operation, mirror relationship, and clear floor space depend on the applicable jurisdiction and project criteria. I ask the responsible designer to state those requirements on the accessible-room drawing. The factory should not guess from a general note.
Prove the Drawing on One Working Unit
A digital model catches many collisions, but water and hands expose different problems. I want the specified faucet, drain, overflow, trap, valves, drawers, backsplash, mirror zone, sealant joints, and cleaning tools present in the mock-up. The test should include filling, draining, wiping, opening drawers, reaching service points, and observing standing water.
The published guide to integrated sink drain alignment narrows the check from bowl outlet through the waste fitting into the cabinet. Use it after the dimensional envelope is established, because a correct drain axis still needs enough room for assembly, adjustment, and maintenance.
Long spans and narrow material bridges also depend on support. Bathroom Vanity Countertop Support: Sink Cutouts, Long Spans, Cabinet Rails, and Brackets separates the bearing path from wall fixing. I use that support review before approving any last-minute bowl enlargement.
Once the unit works, I record the actual integrated sink vanity top dimensions rather than relying on the pre-mock-up file. The record includes revision, room type, top and cabinet IDs, key measurements, photographs with a scale, faucet and drain models, water-test notes, and approved deviations. Production releases that record, not an earlier drawing saved under a similar filename.
For projects with several widths, one successful mock-up does not automatically validate all types. I compare the governing conditions. A wider top may change span support. A narrower cabinet may compress trap space. A wall-mounted faucet may move the rear deck decision into the wall. Similar appearance does not prove identical construction.
I also compare integrated sink vanity top dimensions against packaging supports and handling points. A deep bowl or long apron changes the underside profile, so the crate arrangement must avoid loading a delicate edge or projecting basin section during transport.
What Must Be Fixed before Repeated Production
The drawing needs a named origin
Finished wall references and finished floor level are more useful than an unexplained centerline. Every dimension that affects another trade should state its origin. I also want the drawing units, tolerances, and revision visible on each sheet rather than hidden in an email.
The physical unit decides whether the geometry is usable
CAD can confirm that shapes do not overlap. It cannot prove that a hand can clean behind a faucet, a plumber can tighten a fitting, or water leaves the basin without residue collecting on a flat shelf. The mock-up converts geometry into a routine.
A discovered conflict needs a controlled stop
If a dimensional problem appears on site, first photograph the complete vanity and the measurement from a named finished reference. Second, stop installation or alteration of affected units until the discrepancy is reviewed. Third, send the supplier the room type, drawing revision, top and cabinet IDs, and original inspection record so the team can compare intended and actual geometry.
The parent decision remains the whole package
Integrated Sink Vanity Top: Bowl Geometry, Drainage, Support, and Replacement connects dimensions to material, cleaning, service, support, and future replacement. I use the dimensional record as one part of that package, not as a substitute for the complete decision.
Frequently Asked Questions
1. What are the most important integrated sink vanity top dimensions?
The essential set includes overall top width and depth, finished top height, bowl position and geometry, drain center, faucet center, rear deck, front rail, side lands, overhangs, wall allowances, backsplash plane, cabinet opening, drawer envelope, and service space. The project may need more. All values should share named finished-room references.
2. Can the basin simply be centered on the cabinet?
Only when the cabinet center, finished top center, room center, plumbing position, mirror axis, and intended visible lands genuinely agree. Side scribes and unequal overhangs often break that assumption. Dimension the bowl from a controlled origin instead of relying on a center symbol.
3. How much space is needed behind an integrated basin?
There is no universal rear-deck value. The answer depends on the faucet base, handle movement, spout reach, backsplash or wall plane, cleaning access, bowl rim geometry, fabrication method, and project tolerance. Fit the specified faucet in the mock-up and verify the full routine.
4. Should every hotel room type use the same vanity top?
Standardization helps only when the room envelope, cabinet, plumbing, accessibility criteria, and use are compatible. A common appearance can hide different widths or service requirements. Give each genuinely different assembly its own type code and approved record.
5. What should the site team do when a vanity dimension does not match?
Photograph the full condition and measure from the finished reference named on the drawing. Do not cut, force, or alter more units while the cause remains uncertain. Send the supplier the room type, component IDs, drawing revision, and original inspection images for comparison before agreeing on repair or replacement.
Quick-Reference Checklist for the Dimension Release
- Name the finished wall and floor origins on every coordinated drawing.
- Dimension bowl, drain, faucet, deck, rails, lands, and overhangs from those origins.
- Overlay the underside bowl and plumbing envelope on the cabinet section.
- Install the specified faucet, drain, trap, valves, and drawers in the mock-up.
- Measure and photograph the accepted physical unit after testing.
- Assign separate type codes where room geometry or accessibility changes.
- Release repeated production only against the final approved revision.
Final Conclusion
Integrated sink vanity top dimensions work only when the room, top, bowl, faucet, drain, cabinet, support, and room schedule use one coordinate system. Name the finished origins, draw the sections, protect usable material around the bowl, overlay the cabinet and plumbing, and prove the result on a working unit. Here is what I would do: freeze the physical record only after every drawer opens, every fitting can be reached, and water leaves the basin as intended. That is the dimensional standard I would release with KA UNITED.

References
- NKBA Kitchen & Bathroom Planning Guidelines, National Kitchen & Bath Association.
- NKBA | KBIS 2026 Bath Trends Report, National Kitchen & Bath Association.
- Dimension Stone Design Manual, Natural Stone Institute.
- A Homeowner's Guide to Natural Stone Countertop Installation, Natural Stone Institute.
- ANSI A117.1 Accessible and Usable Buildings and Facilities, International Code Council.
- Uniform Plumbing Code, International Association of Plumbing and Mechanical Officials.
- International Plumbing Code, International Code Council.
- Google Search Central: Creating Helpful, Reliable, People-First Content, Google.