


Bathroom Vanity Cabinet Ventilation: Moisture Paths, Back Panels, And Service Gaps
Bathroom Vanity Cabinet Ventilation: Moisture Paths, Back Panels, and Service Gaps
A slow concealed drip can leave a cabinet front looking untouched while moisture accumulates behind the back panel, and the lower back edge may be one of the first places to show swelling. The room did not need a grand explanation. It needed a way for moisture to be found and managed early.
Bathroom vanity cabinet ventilation begins with the real bathroom vanity cabinet ventilation path: where humid air sits, where a leak appears, and whether a technician can reach the condition before the woodwork carries the damage.
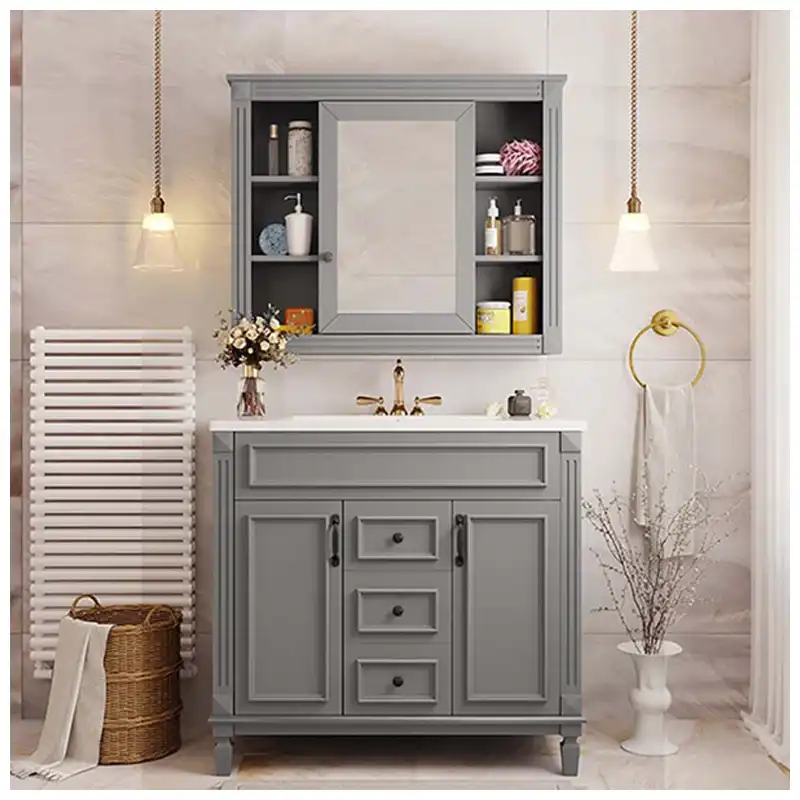
In my experience, a decorative front panel offers no protection if the internal service gap is too tight for a technician to reach the plumbing fittings without removing the entire unit.
Find the Moisture Path before Adding Openings for Bathroom Vanity Cabinet Ventilation
Not every vanity cabinet needs an added drying path, and that is where the decision has to start. A cabinet with a sealed base, a dry service void and no continuous moisture source may need nothing beyond sound leak control and reachable access, and adding openings there may create an unnecessary splash path or cleaning problem without solving a demonstrated moisture condition. The opening is justified when the cabinet actually holds a moisture source: a plumbing void that stays damp, a wet cleaning cloth stored inside, or a floor detail that lets water reach the base. I settle which of those applies at a completed hotel bathroom mock-up, before finishes go on. I dimension the top and the carcass from the same floor datum before either is released to the line. A late answer may mean that humidity stays in the cabinet until the finish changes. The drawing set and mock-up photographs carry room-type drawing forward. Once the mirror, basin, and cabinet are present, the practical effect of a removable plumbing back panel becomes visible.
The room record pairs the room-type drawing with the first-unit approval record. The former defines the intended geometry; the latter documents the actual installed condition. This dual reference prevents site teams from guessing whether a specific back-panel configuration was approved or merely improvised during installation.
I physically inspect the cabinet interior while simulating daily use. If a fixed back panel obstructs the shut-off valves or trap access, the design fails regardless of its appearance. I verify this by moving through the typical maintenance positions: standing at the basin, kneeling for drawer removal, and reaching from the side. The goal is ensuring that both the guest's visual experience and the technician's physical access are resolved within the same mock-up phase.
This room decision stays with the package record for Hotel Bathroom Vanity Packages Complete Guide, where the top, carcass, sink, plumbing, light and replacement details are already collected.
Coordinate the Back Panel with Plumbing Access
Before releasing the room type, I validate the service gap using actual plumbing fixtures rather than cardboard templates. Insufficient clearance here typically forces field cuts that compromise structural integrity. I assess the gap by attempting to operate the valves and remove the trap in situ. Real-world ergonomics provide a far more accurate assessment of maintainability than theoretical drawings or isolated sample boards.
During the initial inspection, I compare the installed cabinet void against the approved room drawing. I simulate normal usage conditions to ensure the back panel does not impede valve or trap access. A finish schedule cannot override physical constraints; if the panel blocks inspection, it must be modified. I attach the first-unit approval record directly to the room type documentation, avoiding reliance on scattered email threads. Physical testing reveals moisture traps that remain invisible under static lighting conditions.
I use the Bathroom Vanity Water Test only after the sink, cabinet, wall, light, and maintenance needs are written into the same room decision.
Effective bathroom vanity cabinet ventilation starts with a defined purpose. Each gap has to answer to a defined drying or service need rather than a decorative hole pattern. Three jobs are often collapsed into the word ventilation, and they need to be separated on the drawing. Leak control keeps liquid water out: the trap, the sink joint and the floor detail. Service access lets a person reach the valves and the trap without cutting the cabinet. The drying path lets humid air exchange with the room so a damp void can recover. A removable back panel earns its place in the second of those three: it makes the leak path visible and the fittings reachable, and it does not by itself move air. The reach, isolation and removal procedure belongs to Hotel Bathroom Vanity Service Access That Maintenance Can Actually Use, while this article stays on the drying-path question. A panel that opens into a closed wall cavity would relocate concealed moisture rather than remove it, so any air path has to be defined against the cabinet void, the service void at the back of the carcass, and the room side air, not against the wall build-up.
Keep Air Gaps out of Direct Splash Zones
I observe the housekeeping routine during the mock-up phase to identify splash zones near the service gaps. Using real fittings, I verify that clearances do not allow floor water to wick into the cabinet base. The production release must explicitly define these interfaces between the cabinet and countertop. Evaluating these gaps in the context of the full working room ensures they function correctly alongside adjacent finishes and fixtures.
The final room record integrates the cabinet-top interface details with the maintenance handover sheet. This combination clarifies exactly which configurations were approved and their specific application limits. It eliminates ambiguity regarding the installation of support rails beneath the countertop, ensuring future repairs adhere to the original engineering intent.
Feedback from housekeeping often highlights issues at the toe base where water accumulates during mopping. I document the approved waterproofing details before mass production begins to prevent recurring failures. Since standard toe bases can absorb moisture from routine cleaning, I evaluate the joint integrity from multiple angles, including the cleaning position. This rigorous assessment distinguishes a functional, coordinated assembly from a purely aesthetic specification.
| Decision point | Evidence to inspect | Release condition |
|---|---|---|
| Back panel | Removable zone, fixings, and plumbing envelope | Valves and trap can be inspected without damaging the cabinet |
| Air path | Protected gaps and cabinet voids | Humidity can dissipate without a direct splash entry |
| Base protection | Toe space, floor joint, and cleaning route | Routine wet cleaning does not soak the cabinet base |
| Top interface | Splash and sink-edge water path | Runoff does not feed the concealed cabinet void |
| Maintenance | Inspection route and room record | A technician can locate the intended access condition |
The Hard-Won Lesson in bathroom vanity cabinet ventilation: A sealed-looking cabinet can hide the first warning sign
A typical concealed seep starts behind a fixed back panel. The base stayed warm and damp, but the front finish looked normal until the lower edge lifted. When the team finally opened the cabinet, the affected area had expanded beyond the original fitting.
The Lesson: Make the likely leak path visible and reachable before the room is handed over.
Protect the Toe Space and Cabinet Base
The secondary review focuses on the support rail beneath the countertop. I inspect both the visible face and the underside simultaneously to ensure consistency before rolling out to other rooms. Overlooking this area risks concealing minor leaks behind deep drawers. By simulating user movements from the doorway to the cleaning zone, I determine if the rail detail withstands daily operational stress without compromising access or stability.

During simulated service visits, I prioritize the condition of the toe base adjacent to wet floors. I finalize the approved detailing before production scales up, ensuring all components remain integrated. Given the risk of water absorption in the toe kick, I cross-reference the maintenance handover sheet with the cabinet, top, and basin drawings. The completed room provides the definitive proof of performance, surpassing the limitations of isolated tabletop samples.
A removable access panel serves inspection and serviceability: it lets someone reach the valves and the trap. It is not a ventilation mechanism, and where a drying path is genuinely required the air route has to be defined separately, from a protected inlet to an outlet that does not admit splash or floor water.
Test the Cabinet after a Wet Room Cycle
Under typical mirror lighting, I scrutinize the cabinet rail beneath the top. Comparing the visible and concealed surfaces while the assembly is intact reveals potential failure points. Small leaks often remain undetected behind full-depth drawers until significant damage occurs. The accepted room file includes the finish-control sample alongside technical drawings and physical references. This comprehensive documentation allows for a realistic evaluation of the rail's functionality within the complete assembly.
For the handover package, I bundle the finish-control sample with the replacement-part record. The former establishes the approved aesthetic and dimensional standards, while the latter ensures consistency across future repairs. This combined evidence enables the design, construction, and maintenance teams to verify the toe space's dry edge against a single, agreed-upon benchmark.
I then evaluate the valve and trap access zone. Ensuring the service path is clearly defined in the sign-off prevents ad-hoc field modifications that could compromise structural integrity. I test accessibility from various positions, including the doorway, basin, and cleaning stance. The design is only approved if maintenance tasks remain feasible from every necessary angle without requiring destructive alterations.
The Hotel Bathroom Vanity Packages Complete Guide works best when its dimensions and finish are coordinated with the cabinet and plumbing before production.
Give Maintenance a Clear Inspection Route
Once the first point is settled, I check the dry edge of a toe space. I lock the vertical alignment on the first unit so subsequent installations do not drift off the plumbing centerline. A late answer may reveal that replacement work cannot identify the original access detail. I crouch at the floor line to check if the mop head hits the cabinet base before reaching the wall. A drawing answer is not enough if the movement feels awkward.
While reviewing a finished suite bathroom, I put a valve and trap access zone ahead of the decorative choices. I keep the service route on the sign-off sheet while the carcass is still open on the bench. My concern is that a field cut weakens the cabinet structure. My marked-up package ties replacement-part record to the cabinet, basin, top, and wall finishes. The completed vanity gives a valve and trap access zone a context that the sample board cannot reproduce.
Before the room type is released, I check it again against Bathroom Vanity Countertop Support so one attractive detail does not conflict with the complete vanity package.
When the specification calls for bathroom vanity cabinet ventilation, the detail must keep the base and toe space protected from wet-floor cleaning, because a mopped floor reaches the toe area long before any splash reaches the doors.
Record the Detail for Replacement and Repair
Returning to a completed hotel bathroom mock-up, my first practical check concerns the dry edge of a toe space. I dimension the top and the carcass from the same floor datum before either is released to the line. The room may reveal that replacement work cannot identify the original access detail. I record room-type drawing only after the top and cabinet information agree. Only the assembled room shows whether the dry edge of a toe space works beside its real neighbors.
The approval record places room-type drawing with first-unit approval record. Their references let the factory and site discuss the same physical condition. A replacement crew can understand the sealant line at the splash without reopening the original design debate.
The assembly still has to answer for a rear ventilation path. I run a full wet cycle on this prototype and observe whether the cabinet void returns to a visibly dry, inspectable condition after the specified wet-use sequence before approving the production batch. That is a practical release observation rather than a quantified drying-rate test: no relative humidity, moisture content or time-to-dry criterion is being measured here. The practical consequence may be that humidity stays in the cabinet until the finish changes. I stand back to see if the gap allows air exchange without letting water splash directly into the void. Those viewpoints reveal conflicts that an elevation can hide.
A decision about bathroom vanity cabinet ventilation must require the first completed room to prove that access and drying both work, because a drawing never demonstrates either one and a sample board never gets wet.
Where Moisture Gets Trapped in a Vanity Cabinet
Ventilation is not a substitute for leak control
The first defence is a sound basin, faucet, drain, top joint, and floor detail. Air movement helps the cabinet recover from ordinary humidity, but it will not dry a base that is already taking water. Check the joints before you size any opening.
Access changes maintenance behavior
A reachable valve or back-panel route makes an early inspection practical. A sealed void invites delay. My test is whether a technician can reach the trap and shut-off valves without cutting the cabinet or lifting the countertop.
The base deserves equal attention
Floor washing and small overflow events often reach the toe space first. Protect that edge with a sealed floor joint, inspect it at the finished line rather than on the shop drawing, and test it in the completed room.
A working bathroom vanity cabinet ventilation detail should follow the likely water and air path, not a decorative vent pattern copied from another project.
The same detail needs removable access for the service components that are most likely to be checked later, which in most vanities means the shut-off valves and the trap.
Whatever opening is finally chosen must keep the base and toe space protected from wet-floor cleaning and from small overflow events.
Before release, I revisit the warm void behind closed doors with the housekeeper who wipes the rear deck, and I record the approved detail before repeated rooms begin. I leave the cabinet and top section with the room type because an opening placed there lets floor water enter directly. If the team cannot point to that evidence later, the detail was discussed but never fully coordinated.
Later in the approval record, the product route for bathroom vanity tops should name the stone, edge profile, and sink cutout, so the cabinet opening is not decided twice. Keep that reference with the signed record rather than reopening the decision from memory.
The related decision is documented in Bathroom Vanity Plumbing Rough-In: Drain Center, Shutoff Valves, Trap Space, and Drawer Clearance. Hold that file with the room type so the drain center and valve positions survive the next revision, instead of being re-argued on site.
For an operational comparison, keep Bathroom Vanity Water Test before Hotel Handover. Keep the test record in the signed handover file, so a later leak can be compared against the room's original dry condition.
The next material or project question belongs with Bathroom Vanity Sealant Joints Around the Sink, Backsplash, Wall, and Cabinet. Attach that sealant detail to the same signed record, because a re-sealed joint that ignores the original backing rod commonly fails again.
Frequently Asked Questions
1. Does every bathroom vanity cabinet need ventilation holes?
No. The required condition depends on the cabinet design, moisture exposure, plumbing layout, local requirements, and material system. Start with water control and service access.
2. Can a removable back panel help with cabinet moisture?
It can improve inspection and maintenance access when it is designed around the plumbing and structure. It does not replace proper leak control or edge protection.
3. Why do vanity cabinet bases swell?
Possible causes include leaks, wet-floor cleaning, overflow, poor edge sealing, trapped humidity, or a combination of these conditions. Inspect the water path before choosing a repair.
4. Should a vanity cabinet have a full back?
The answer depends on support, wall condition, plumbing, access, moisture exposure, and the approved cabinet construction. Draw the complete section.
5. What should happen when moisture is found inside a finished cabinet?
Photograph the condition, stop further wet use if active leakage is possible, identify the water source, and compare the cabinet with the original plumbing and inspection records before repair.
Quick-Reference Checklist for bathroom vanity cabinet ventilation
- Map the likely leak and humidity path behind the doors and drawers.
- Provide approved access to valves, trap, and likely inspection points.
- Protect the toe space from wet-floor cleaning and overflow.
- Check back-panel and cabinet-rail changes against the support detail.
- Test the completed room after normal water use and cleaning.
Final Conclusion
The useful ventilation detail is the one that lets a cabinet dry, be inspected, and survive ordinary bathroom service without becoming a visible design distraction. The final decision on bathroom vanity cabinet ventilation must stay attached to the evidence that production and site teams can verify.
This is where you do not cheap out: at KA UNITED, I would rather leave one smart access route than replace a cabinet after one hidden leak.
References
- Architectural Woodwork Standards, Woodwork Institute and AWMAC.
- ANSI/KCMA A161.1 Performance and Construction Standard, Kitchen Cabinet Manufacturers Association.
- Wood Handbook: Wood as an Engineering Material, USDA Forest Products Laboratory.


