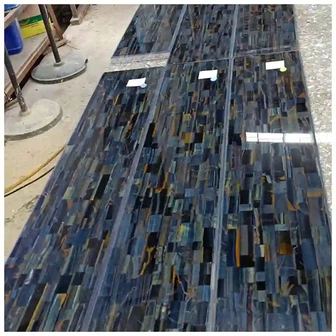
Quartz Vanity Top With Undermount Sink Coordination
Quartz Vanity Top with Undermount Sink: Reveal, Clips, Support, and Service Access
The top drawing and cabinet drawing each look correct until the sink clips arrive. Two clips land directly over the front rail, the faucet nut has no tool path, and the trap crosses the upper drawer. Moving one item shifts three others.

A quartz vanity top with undermount sink needs one coordinated section through the basin and another through the faucet. I want the final fixture template, reveal, bridge widths, support method, rail positions, plumbing envelope, and removable access shown before the opening reaches the cutting table.
My direct answer is to approve the sink while it is fixed to the actual top and cabinet. Fill it, drain it, open every drawer, reach every connection, and identify how the basin could be removed later without breaking the top or cabinet.
Table of Contents
- Freeze the Final Basin and Reveal
- Protect Stone around the Cutout
- Keep Clips and Supports Clear of Cabinet Rails
- Coordinate Faucet, Trap, Valves, and Drawers
- Seal and Wet-Test the Finished Assembly
- Plan Basin Removal before the Room Opens
- Carry the First-Piece Detail into Repeated Rooms
- Frequently Asked Questions
Freeze the Final Basin and Reveal for Quartz vanity top with undermount sink
At the underside before the cabinet drawers are fitted, I put the manufacturer cutout template ahead of the decorative choices. I use the final basin template and product reference while the relevant parts are still together. My concern is that a substituted basin may not fit the released opening. My marked-up package ties the signed basin template and cutout revision to the cabinet, basin, top, and wall finishes. The completed vanity gives the manufacturer cutout template a context that the sample board cannot reproduce.
Production receives faucet and plumbing sections with tool paths with drawer, trap, valve, and overflow clearances. Together they connect the room decision to fabrication, installation, and later service. Later questions about front and rear bridge widths go back to a record, not somebody's recollection.
Once the first point is settled, I check the path for future basin removal. I approve the reveal on a finished first piece before the same decision is repeated across rooms. A late answer may reveal that a substituted basin may not fit the released opening. To judge the path for future basin removal, I move between the doorway, basin, open drawers, and cleaning position. A drawing answer is not enough if the movement feels awkward.
I keep this room decision with Quartz Vanity Tops for Hotel and Multi-Unit Bathrooms, where the top, cabinet, sink, plumbing, light, installation, cleaning, and replacement details meet.
Protect Stone around the Cutout
The assembly still has to answer for the manufacturer cutout template. I map every clip, bracket, rail, and reinforcement zone before the same decision is repeated across rooms. The practical consequence may be that an uneven reveal can collect residue and look careless. To judge the manufacturer cutout template, I move between the doorway, basin, open drawers, and cleaning position. Those viewpoints reveal conflicts that an elevation can hide.
When I inspect the sink perimeter after daily wiping, my first practical check concerns the positive, flush, or negative reveal. I approve the reveal on a finished first piece while the relevant parts are still together. The room may reveal that an uneven reveal can collect residue and look careless. I record finished opening dimensions and reveal photographs only after the top and cabinet information agree. Only the assembled room shows whether positive, flush, or negative reveal works beside its real neighbors.
I use the bathroom vanity top range only after the sink, cabinet, wall, light, and maintenance needs are written into the same room decision.
For quartz vanity top with undermount sink, treat the opening, fixing system, cabinet, and plumbing as one assembly.
Keep Clips and Supports Clear of Cabinet Rails
While viewing a plumber reaching the faucet fixing nut, I resolve the front and rear bridge widths before moving to finishes. I map every clip, bracket, rail, and reinforcement zone while the relevant parts are still together. A late answer may mean that narrow bridges can be vulnerable during handling and use. The drawing set and mock-up photographs carry support and clip spacing shown on the cabinet plan forward. Once the mirror, basin, and cabinet are present, the practical effect of front and rear bridge widths becomes visible.
I do not separate wet-test time and underside photographs with replacement basin reference and removal instructions. One identifies the approved result and the other preserves how it was achieved. Site and factory now have one reference for resolving sink clip and bracket zones.
Standing at the vanity, I examine the positive, flush, or negative reveal. I draw sections through the drain and faucet before the same decision is repeated across rooms. Otherwise, narrow bridges can be vulnerable during handling and use. To judge positive, flush, or negative reveal, I move between the doorway, basin, open drawers, and cleaning position. I want the guest and housekeeper to encounter the same resolved detail.
| Decision point | Evidence to inspect | Release condition |
|---|---|---|
| Basin identity | Final model, template, rim, overflow, and drain | No substitution without renewed review |
| Cutout and reveal | Dimensions, radii, polish, and visible alignment | Even approved reveal around the complete bowl |
| Support | Clips, brackets, adhesive, rails, and reinforcement | Loads transfer without unplanned rail cutting |
| Service space | Faucet, trap, valves, drawers, and tool path | Connections remain installable and removable |
| Wet test | Filled bowl, drainage, overflow, and underside inspection | No leakage, ponding, or inaccessible joint |
The Hard-Won Lesson in quartz vanity top with undermount sink: The underside decides whether the clean top survives
A finished face may look flawless while two sink clips sit where the cabinet rail must carry the top. Cutting the rail creates a new support problem; omitting the clips changes the basin fixing. The conflict was invisible because the approval stopped at the top view.
The Lesson: Approve the underside section with the real cabinet, sink hardware, and plumbing before cutting the top.
Coordinate Faucet, Trap, Valves, and Drawers
Before signing the room type, I test the front and rear bridge widths. I test the complete fitting with real hardware before the same decision is repeated across rooms. That omission often means that clips may require field cutting of structural cabinet rails. To judge front and rear bridge widths, I move between the doorway, basin, open drawers, and cleaning position. Daily reach and clearance settle the question more honestly than a sample board.

As I look at the upper drawer moving beneath the bowl, I test the faucet-hole position behind the bowl against the room drawing. I draw sections through the drain and faucet while the relevant parts are still together. The finish schedule cannot change the fact that clips may require field cutting of structural cabinet rails. I put front and rear bridge dimensions beside the room type rather than leaving the decision in an email. Daily use gives a more honest test of faucet-hole position behind the bowl than desk light.
With quartz vanity top with undermount sink, protect the remaining stone while preserving clip and support access.
Seal and Wet-Test the Finished Assembly
During a check of a full basin held during the wet test, I bring the sink clip and bracket zones into the mock-up first. I test the complete fitting with real hardware while the relevant parts are still together. The mock-up has to test whether the faucet nut can become inaccessible behind the bowl. The production release points directly to faucet and plumbing sections with tool paths. That is why I judge sink clip and bracket zones in the working room rather than in isolation.
The final room record joins first-piece underside and finished-face records with finished opening dimensions and reveal photographs. The pair shows what was accepted and where that acceptance applies. Nobody has to guess what the team meant when it accepted adhesive and sealant compatibility.
Housekeeping and maintenance bring me back to the faucet-hole position behind the bowl. I follow the selected system manufacturer instructions before the same decision is repeated across rooms. The trouble is that the faucet nut can become inaccessible behind the bowl. To judge faucet-hole position behind the bowl, I move between the doorway, basin, open drawers, and cleaning position. That is how I separate a coordinated assembly from a decorative specification.
The bathroom cabinet range works best when its dimensions and finish are coordinated with the cabinet and plumbing before production.
Plan Basin Removal before the Room Opens
The second pass deals with the sink clip and bracket zones. I fill and drain the basin while inspecting below before the same decision is repeated across rooms. Miss it, and the trap may collide with a full-depth drawer. To judge sink clip and bracket zones, I move between the doorway, basin, open drawers, and cleaning position. That short walk tells me whether the detail survives daily use.
While reviewing a maintenance visit with the mirror and splash in place, I begin with the cabinet rail depth and location. I follow the selected system manufacturer instructions while the relevant parts are still together. The risk is that the trap may collide with a full-depth drawer. I save adhesive, sealant, and cleaning compatibility notes after comparing the cabinet drawing, top drawing, basin, and visible finishes. The completed room shows whether cabinet rail depth and location still works beyond the isolated meeting-table sample.
Before the room type is released, I check it again against Quartz Vanity Tops for Hotel and Multi-Unit Bathrooms so one attractive detail does not conflict with the complete vanity package.
When the specification calls for quartz vanity top with undermount sink, prove drainage, leakage control, cleaning, and removal on the first piece.
Carry the First-Piece Detail into Repeated Rooms
Returning to the first repeated room after quantity installation begins, I focus first on the adhesive and sealant compatibility. I fill and drain the basin while inspecting below while the relevant parts are still together. The reason is practical: adhesive alone may be used where the system requires support. The accepted room file receives wet-test time and underside photographs, along with the drawing and physical finish references. With every component present, the practical effect of adhesive and sealant compatibility becomes easier to judge.
For handover, I keep the signed basin template and cutout revision with front and rear bridge dimensions. One fixes the approved appearance or dimension; the other carries it into repeated work. That evidence lets all three teams test upper drawer and divider movement against the same accepted condition.
From there, I turn to the cabinet rail depth and location. I keep removable access around trap and valves before the same decision is repeated across rooms. If nobody resolves it here, adhesive alone may be used where the system requires support. To judge cabinet rail depth and location, I move between the doorway, basin, open drawers, and cleaning position. The detail passes only when every position remains workable.
A decision about quartz vanity top with undermount sink must repeat the approved underside detail rather than allowing room-by-room improvisation.
Where an Undermount Basin Detail Usually Fails
The template belongs to one final model
Nominal basin dimensions do not define rim shape, corner radius, clip position, overflow, or cutout. A substitution triggers a new overlay.
Support cannot be decided after installation
The remaining quartz, sink load, cabinet rails, and fixing system need a continuous load path. Field improvisation can weaken more than one component.
Service access is part of the design
The faucet, trap, valves, clips, and basin may need replacement. Leave hand and tool space before drawers and panels close the cabinet.
Basin weight changes during use. The empty fixture, standing water, a person leaning on the front rail, and forces from cleaning or drain service act through different points. The project engineer and system suppliers define final support where required, while the coordination drawing ensures those supports have real cabinet structure beneath them.
Frequently Asked Questions
1. Which reveal is best for an undermount vanity sink?
Positive, flush, and negative reveals each have visual, cleaning, fabrication, and fixture implications. Approve one using the final basin and finished first piece.
2. Can adhesive alone support the basin?
Follow the sink, surface, fixing-system, and project requirements. Do not assume one adhesive bead replaces the specified clips, rails, brackets, or other support.
3. How much quartz should remain in front of the cutout?
The required bridge depends on material, thickness, opening, edge, span, support, fabrication, handling, and manufacturer guidance. Use the engineered detail.
4. Can cabinet rails be cut for sink clips?
Only through an approved redesign that preserves cabinet strength and top support. Map clip zones before production so field cutting is unnecessary.
5. What should happen if the basin leaks during the first test?
Stop the test, photograph the face and underside, record the water path, and compare the cutout, reveal, fixing, sealant, drain, and cabinet level before repair.
Quick-Reference Checklist for quartz vanity top with undermount sink
- Use the final sink model and manufacturer template.
- Approve the complete reveal and polished cut edge.
- Map clips, brackets, rails, reinforcement, and bridge widths.
- Draw faucet, trap, valve, overflow, and drawer clearances.
- Wet-test drainage and inspect the underside before closing access.
- Record how the basin can be removed without damaging the package.
Final Conclusion
The cleanest sink line is useful only when the opening remains supported, the plumbing fits, and maintenance can reach every fixing. The final decision on quartz vanity top with undermount sink must stay attached to the evidence that production and site teams can verify.
Here is what I would do: approve the face and underside together, because KA UNITED has to hand over a working vanity, not a tidy photograph.
References
- Sink, Wikipedia.
- 2026 Bath Trends Report, National Kitchen & Bath Association.
- Dimension Stone Design Manual, Natural Stone Institute.
- Engineered Stone Fabrication Guidance, manufacturer-specific technical documentation.
- Bathroom Planning and Fixture Coordination Guidance, local code authority.
- Tile Installation Handbook, Tile Council of North America.
- Quartz Surface Care and Maintenance Instructions, selected surface manufacturer.