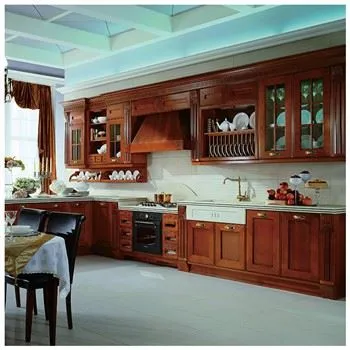
Processing Operation Procedure Of Quartz Stone Cabinet Table
I have watched enough quartz countertops come off a production line to know the slab is the easy part. By the time it reaches a cabinet shop it is a flat, finished rectangle with a gloss face and a square edge. Everything that turns that rectangle into the top sitting on kitchen cabinets happens in a fabrication shop, and that is where a countertop is won or lost.
The work splits into five operations that every quartz cabinet table passes through, and I will describe them in the order we actually run them. The order matters more than most buyers realize. Do a step out of sequence and the error compounds into a seam you can pick out from across the room.
When I say quartz here I mean engineered stone, roughly 93 percent crushed quartz with about 7 percent resin and pigment. It machines differently from granite and marble, and the procedure below is tuned to how that material behaves. For how the slab is produced before it reaches a shop, see how artificial quartz is made.
The Five Operations, and Why the Order Is Fixed
The route reads short on paper: open the sheet, cut the corners, drill the openings, grind the edges, splice the seams. The table maps the five operations, and the sections after it go into each one.
| Operation | Main tool | Key check or tolerance | What fails when it is skipped |
|---|---|---|---|
| Opening the sheet | Saw, hand and edge cutters | 90% utilization, 3 to 5 mm wall gap | Wasted stock, seams in the wrong place |
| Trimming the corners | Router with aluminium guide | Flush joints, 0.5 mm straightness | Visible gaps that need heavy grinding |
| Drilling openings | Diamond drill, hand cutter | 2 mm basin gap, relief holes | Corner cracks, split panels |
| Edge grinding | Water-fed pads, mill | Grit ladder to 3000, kept wet | Scorched resin, dull or scratched edges |
| Splicing | Tinted adhesive, clamps | Color match, clamps every 5 to 10 cm | Open seams, weak or discolored joints |
Opening the Sheet
Opening the sheet is the first cut, and it decides how much of the rest of the job is correction. Get the layout wrong and every later step pays in wasted stock or a joint that lands where everyone can see it.
Reading the Drawing First
No blade touches the slab until someone has read the drawing properly: the plan and section views, the size and color and shape of each part, and what every code means. It also means the exploded view, because a quartz countertop is a set of parts: the baffles, the edge return strips, the water retaining strip, and the main panels. I check the assembly before any single piece.
Choosing the Slab and Checking the Batch
We pick the slab specification from the table size, then check the batch number before cutting. Two slabs from different batches can drift in tone even under the same color name, and the difference shows at the seam. We also inspect the surface for cracks and defects and decide whether each flaw can be laid out around or the sheet set aside, because finding a spot after the countertop is finished costs far more than finding it on the raw sheet.
Layout, Expansion Gap, and the 90 Percent Target
The layout principle is simple: meet the drawing and waste as little as possible. We aim to use 90 percent of the sheet or better and keep any leftover strip wider than 60 millimetres so it stays useful. We avoid a splice in the back wall where the drawing allows, and we leave a 3 to 5 millimetre expansion gap against the wall. On straight runs the saw moves at about four metres a minute, and we run the hand cutter alongside the edge cutter so a long straight and a small notch do not compete for the same tool. After cutting, every piece is checked against the drawing for size, segment, paving order, job number, and joint position.
Trimming the Corners and Straightening the Edges
Once the sheet is opened, the cut edges are close but not clean. Trimming is where the pieces start to actually fit each other, and it determines how tight the final seams will be.
Straightening with a Router and a Guide
We straighten the sawn edges with a router run against an aluminium guide. The guide keeps a hand-held cut straight, and the router takes the saw marks off and brings the edge to the line. A straight, square edge means the pieces meet flush when dry-assembled, and a flush joint needs less grinding later.
Trial Assembly and Joint Correction
Before any glue goes on, we dry-assemble the parts against the component drawing and check whether the joints close tight and flush. Where a joint is uneven, we correct it with the router, an air grinder, or a sanding board. The rule I repeat on the floor: the closer and flusher the interface is before gluing, the less grinding after.
Drilling the Sink and Hob Openings
Openings are where a quartz countertop is most likely to crack, because you are cutting a hole inside a panel and every inside corner is a stress point. This step gets the most caution per square centimetre of any operation in the shop.
Marking, Review, and the Corner Relief Hole
No opening is cut until it has been marked, positioned, and reviewed by the team leader, and every cut runs with cooling water, because quartz heats up fast under a diamond tool and heat is what starts a crack. The panel sits on a wooden workbench supported across its full face, never hanging, because a panel that is unsupported under the cut can drop and split. Faucet and gas holes are cut to a template with an electric hand drill and a diamond bit guided through a wooden jig. For a sink or hob cutout the sequence matters: after the line is drawn, we drill a relief hole at each inside corner first, then run the hand cutter along the inner side of the line so the cut ends in the relief hole instead of running past the corner. The corner keeps as large a radius as the layout allows.
Sink, Basin, and Hob Clearances and Reinforcement
The clearances are small but they decide a clean fit. A basin opening leaves about 2 millimetres of gap on each of its four sides, and a hob opening leaves a clearance ring around the appliance body so the metal never sits hard against the stone. After the cutout we reinforce it, because even a correct opening weakens the panel around its perimeter: curved quartz strips around the four corners, and stone strips about 25 millimetres wide around the rest. Every sink, basin, and hob opening then gets three water grinds at 50, 150, and 500 grit so the cut edge is smooth and free of micro-cracks.
Grinding the Edges Back to Gloss
Quartz arrives with a factory-polished face, and a good edge job brings the cut edge up to something close to that gloss. This step separates a careful shop from a rushed one more visibly than any other.
Edge Profiles and the 0.5 Millimetre Rule
The edges we produce cover the common set: back wall edge, straight edge, beveled edge, leading edge, and the special shapes a design calls for. All are water-polished to a brightness close to the original factory surface. Where an edge is ground by hand, straightness has to hold within 0.5 millimetres along its length. Water grinding is polishing, not shaping: the profile is set before the pads touch it, and grinding will not fix a profile that was cut wrong.
The Grit Ladder and Why Water Matters
We climb the edge through a grit ladder, starting coarse and ending fine. The full sequence runs 50, 100, 150, 300, 500, 800, 1000, 1500, 2000, and 3000 grit, and for a straight run the shop standard compresses it to six stops at 50, 150, 1000, 1500, 2000, and 3000, with the mill at about 4000 revolutions per minute. Every pass has to finish before the next grit starts, because a skipped grit leaves scratches the finer pads will never remove. Water flows the whole time and enough of it, because a dry patch at the fine grits scorches the surface and turns it black. The bottom of the table stays straight, and where sections sit side by side their heights are matched so the top does not step between panels.
Splicing and Bonding the Seams
Splicing is the operation buyers notice most, because two pieces of quartz become one countertop here. A good seam is hard to find; a bad one is the first thing you see.
Color-Matched Adhesive, Mixed to Spec
Nothing gets glued until the pieces from the previous operation have been inspected and anything out of tolerance rejected. Before bonding, whoever is on the job reads the single-piece drawing and works out how every joined section relates to the whole set, then collects the adhesive, straight edge, and leading edge materials the job needs. The adhesive is tinted to the slab by one dedicated person, prepared a full container at a time so the color stays consistent, and matched as close to the slab tone as the pigments allow. The team leader checks the tint before it goes on, and it is used only when it matches the top.
Straight Edge, Front Edge, and Reinforcement Strips
For a quick-dry adhesive we mix glue and curing agent to the ratio the manufacturer prints, and we do not dump in extra hardener, because over-hardening weakens the bond and shifts the joint color. Each mix is sized to what will be used and adjusted for weather and temperature. The straight edge is bonded first: the mating faces are cleaned, dried, and leveled, the same-color adhesive is applied evenly within about 15 millimetres of the edge of the bottom panel, the strip is set into it and rubbed side to side to push out the air, and clamps hold it with moderate pressure every 5 to 10 centimetres. The squeeze-out is scraped once it is semi-dry. After the edge bond dries, a same-color quartz reinforcement strip is bonded across the straight edge and the panel, and a lining wood strip is bonded flat to the underside. The front edge follows the same route: the reinforcement is fixed to the bottom of the panel first and left to dry completely, then the front edge is glued to it, the squeeze-out is scraped at half-dry, and the wood strip goes on last. Every layer bonds to a dry surface.
Why the 93 Percent Quartz Decides the Method
The procedure above is shaped by what quartz actually is: around 93 percent crushed quartz with roughly 7 percent resin and pigment as binder, which gives it two habits that drive every shop decision. It is hard and dense, so it resists scratching and staining the way a natural stone with open pores does not. It is also resin-bound, so it cuts cleanly on a waterjet for curves and routs well on a CNC for sink cutouts and edge profiles without the chipping you fight on a crystalline natural stone. That machinability is why quartz splices into near-invisible joints, and it is why the expansion gaps and corner relief holes matter: the resin softens slightly with heat, so you manage heat with water and leave the top room to move.
The resin also makes quartz less forgiving of a rushed grind. Skip water at a fine grit and the resin scorches black where granite would just get hot. None of this is exotic; it is the ordinary behaviour of a material that is mostly quartz with a little resin, and it is the reason the five operations are run the way they are.
What I Check Before a Quartz Table Leaves the Shop
My last pass before a countertop ships is short, and it is the same list I would want a customer to run against our own work. I check the seams against the light, because a seam you can feel or see from a standing distance means the joint was not pulled flush before it cured. I check the corner radii on the sink and hob openings, because a sharp corner is a crack waiting for a hot pan. I check that the expansion gap is still there and the edges read the same gloss as the face. If any fail, the piece does not leave until it is fixed or remade. Fabrication and installation are two halves of the same job, so I also wrote the guide on the six-step quartz table installation, because the same care has to survive the trip to the site.
Frequently Asked Questions
What are the five main operations in processing a quartz cabinet table?
The five operations are opening the sheet, trimming the corners, drilling the sink and hob openings, grinding the edges back to gloss, and splicing the pieces into one surface. They run in that order because each prepares the surface the next one works on, and doing them out of sequence multiplies errors.
How much quartz is actually in an engineered quartz countertop?
Engineered quartz is roughly 93 percent crushed quartz bound by about 7 percent resin and pigment. The quartz gives the surface its hardness and stain resistance, and the resin holds the mix together and lets the slab be cut and routed cleanly. The ratio varies slightly between manufacturers.
Why do sink and hob cutouts get a relief hole at each corner?
An inside corner is the highest stress point in a quartz panel, and a saw cut that ends exactly at a sharp corner tends to run past it and start a crack. Drilling a relief hole at each corner before the cut gives the cut a clean place to stop, and keeping the corner radius as large as the layout allows spreads the stress.
How do fabricators make a quartz seam nearly invisible?
They tint the adhesive to match the slab, pull the joint flush before it cures, and grind the excess down so the two faces sit in one plane. A dedicated person mixes the color in a single batch so the whole countertop matches, and the pieces are clamped every 5 to 10 centimetres with only enough pressure to hold them closed.
Why is water used during cutting and edge grinding?
Quartz heats up fast under a diamond tool, and heat is what scorches the resin and starts cracks. Water cools the cut and the edge during grinding, which keeps the resin from blackening at fine grits and the panel from expanding unevenly while it is worked. Running a quartz edge dry at fine grits is one of the fastest ways to ruin a good top.
Final Conclusion
A quartz stone cabinet table is only as good as the five operations that built it. Open the sheet from a drawing you have actually read, and the layout pays for itself in stock and in seams that land where you planned them. Cut the corners and drill the openings with relief holes and water, and the panel does not crack later. Grind the edges up the grit ladder and pull the splices flush before the adhesive cures, and the countertop reads as one surface. The slab matters, but the shop decides the result, and that is where a buyer should be asking questions. Understand the process and you can hold a fabricator to it, which is exactly how I would want a customer to treat KA UNITED.