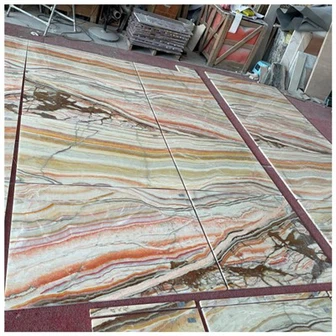
Vanity Backsplash Wall Tolerance And Return Details Before Installation
Vanity Backsplash Wall Tolerance and Return Details Before Installation
On a premium residence project, a 1,600-millimeter vanity top arrived exactly to drawing and left a gap that widened from 3 millimeters at one end to 17 at the other. The wall had been skimmed after measurement and was no longer straight. The installer suggested a heroic bead of sealant. Nobody wanted to photograph that solution. Don't ask me how I know, but a straight top does not make a crooked wall disappear.

I treat the back and side conditions as fabrication inputs, not site decoration. The team measures the finished wall, records bow and squareness, then approves how the top, backsplash, side return, mirror, and cabinet absorb the variation. Here's what I'd do: decide where the tolerance will live before the stone reaches the saw.
How Vanity Backsplash Wall Tolerance Is Measured
Vanity backsplash wall tolerance begins with a finished-condition survey. I check width at the front and back, diagonals, wall bow along the backsplash line, corner angle, tile or plaster thickness, side returns, floor level, and whether the cabinet position can still move. A laser line helps reveal the wall, but the top template must reflect the intended finished contact points.
The live Hotel Bathroom Vanity Packages: Complete Guide to Tops, Cabinets, Sinks, Sizes, and Project Coordination keeps the wall check connected to the cabinet, sink, faucet, mirror, and plumbing. Moving a vanity forward to clear one wall bow can reduce front circulation, change faucet reach, or expose an unfinished cabinet side.
I use the bathroom vanity top range only after the edge, thickness, support, backsplash, and wall condition are understood. Material choice affects how easily a return can be fabricated, handled, trimmed, or replaced, but no material grants permission to ignore the room.
Map the wall where the stone actually touches
I mark the backsplash height and top elevation on the survey. A wall can be straight at 850 millimeters and bowed at 950. I also note mirror channels, concealed lighting, outlets, trim, waterproofing transitions, and shower-glass profiles. The relevant line is the line the finished piece must meet.
This is where you don't cheap out on a template for irregular rooms. A paper dimension saying "wall 1600" cannot show a corner at 88.5 degrees or a localized plaster hump. For repeated rooms, I sample enough locations to determine whether one controlled detail works or whether separate variants are needed.
Choose the Right Backsplash and Side-Return Detail
Bathroom backsplash returns can be separate strips, full-height panels, side splashes, integral upstands, or wall finishes meeting the top. Each route places the joint and tolerance differently. A short separate backsplash can hide a modest rear gap. A full-height slab needs accurate openings, joints, and support over a much larger surface.
A side return beside a wall can protect from splashes, but it can also trap a narrow cleaning line or conflict with a mirror. Beside shower glass, I coordinate which item lands first and whether the return stops, passes behind, or aligns with the profile. I do not leave that decision to two installers meeting for the first time.
The sintered stone options may support thin panel directions, while quartz stone surfaces can provide familiar vanity fabrication. The selected material still needs project-specific edge protection, cutout radii, support, joint, and site handling.
| Site condition | Detail response to approve | What not to do |
|---|---|---|
| Small consistent rear gap | Defined sealant joint or separate backsplash overlap | Assume zero joint along an imperfect wall |
| Wall bow or local hump | Template, scribe allowance, wall correction, or controlled stand-off | Force the top until cabinet or joint distorts |
| Out-of-square side wall | Tapered return, scribed piece, filler, or revised cabinet position | Cut a rectangular top from one front width |
| Full-height panel | Panel template, outlet coordinates, joint and support plan | Use countertop dimensions for the whole wall |
| Mirror over backsplash | Set visible joint, mirror channel, and cleaning access | Let the mirror installer cover an unresolved gap |
| Repeated hotel rooms | Tolerance sample and variant rule | Assume the sample-room wall represents every room |
Coordinate Cabinet Position, Sink, Faucet, and Mirror
Cabinet position controls how much adjustment remains. A filler can absorb a side condition. A finished end beside open space cannot. A wall-hung vanity may have fixed structural anchors. I check whether the cabinet can move without changing basin center, door clearance, plumbing, mirror alignment, or accessibility.
The Vanity Sink Cutout and Drawer Clearance for Hotel Bathrooms matters because changing top depth or cabinet position changes the internal section. Faucet projection and rear clearance also determine whether water collects at the wall joint.
I view the joint under the intended light. Grazing mirror light can exaggerate a wavy wall, uneven sealant bead, or slightly tilted backsplash. This is where you don't cheap out on one finished mock-up with the real mirror and lamp. A joint that looks quiet in construction light may become the brightest line in the bathroom.
Installation Sequence and Approved Site Responses
I write the sequence: verify wall, set cabinet, check level and position, dry-fit top, confirm joint range, install support, set basin and fittings as planned, place backsplash or panel, apply the approved sealant, then photograph the finished condition. The order changes by system, but the team must know who accepts the substrate before stone work begins.

Vanity installation gaps need an escalation threshold. Within the approved range, the installer follows the named joint detail. Outside it, work stops and the team records the wall, top, cabinet, and room code. Trimming stone, packing a cabinet, or rebuilding plaster changes responsibility and must not happen by instinct.
Here's what I'd do: photograph a straightedge or measured reference at the problem area, not only a close-up of the gap. Then compare the approved template, fabrication size, cabinet position, and wall survey. That evidence tells us whether the issue belongs to the substrate, setting, or piece.
Full-height panels need a separate wall survey
A countertop template cannot automatically serve a panel that rises to the mirror or ceiling. The wall may change direction above the top, and outlets, lighting channels, niches, brackets, or concealed access can interrupt the face. I measure the complete panel zone and identify which edges remain visible after trim and fixtures are installed.
For a bookmatched or strongly patterned panel, trimming one side changes the composition. I place the finished opening and joint lines on the actual face before cutting. If the site cannot provide stable final dimensions, the project must choose a later template, an adjustable perimeter detail, or a deliberate joint. Do not spend the best movement on an area the installer may need to remove.
I record that choice beside the room code.
The installer receives the same note.
I include bathroom backsplash returns and vanity installation gaps in the room-specific approval photographs. Don't ask me how I know: both details are often remembered after the sealant cures.
The Hard-Won Lesson: Do Not Turn Sealant Into a Wall-Correction System
A hotel sample room accepted a 4-millimeter rear joint. On the production floor, several walls bowed more than 12 millimeters at backsplash height. Installers filled the difference with sealant to protect the schedule. Under the mirror light, the thick glossy line became more visible than the stone and began collecting dust along its uneven edge.
The Lesson: Stop installation when the gap exceeds the approved range; correct the wall, revise the detail, or remake the piece through a documented decision.
Understanding Vanity Wall Tolerances in Today's Project Market
Why zero-gap drawings are not enough
Drawings communicate design intent, while finished rooms contain construction tolerances. The useful specification names the measurement stage, expected substrate condition, template responsibility, joint range, and approved response. It does not promise that two long surfaces will meet without any allowance.
What option suits repeated projects
For repeated rooms, I use a sample survey to identify common conditions, then define standard and exception details. Some projects benefit from a separate backsplash that overlaps a rear joint. Others need templates by room. The right answer depends on visible joints, material, wall quality, schedule, and replacement planning.
What to do when the site gap is outside tolerance
Photograph the complete vanity and measured gap, stop fixing or trimming, and compare the issue with the original survey, template, shop drawing, and approved mock-up. Contact the supplier and site team with that record before changing wall, cabinet, or stone. Thank goodness for evidence when three trades share one corner.
Wall tolerance cannot be separated from the cabinet and top package described in Hotel Bathroom Vanity Packages: Complete Guide, because fillers, returns, backsplash depth, door swing, and site measurements all affect the finished vanity line.
Frequently Asked Questions
1. What is an acceptable gap behind a vanity backsplash?
There is no universal number for every project. The design team must set a joint range based on wall finish, material, backsplash detail, sealant system, visibility, movement, and installation method, then test it in the mock-up.
2. Can a backsplash hide an out-of-square wall?
It can overlap a controlled rear gap, but it cannot responsibly hide unlimited bow or a badly tapered corner. Survey the finished wall and choose a return, scribe, filler, wall correction, or template suited to the actual condition.
3. Should vanity tops be templated after cabinets are installed?
That often gives the most reliable finished condition, but project sequence may require another method. The responsible team must define when measurement occurs, what is already finished, and which dimensions remain adjustable.
4. How do mirror lights affect backsplash joints?
Grazing and reflected light can emphasize wall waves, tilted strips, uneven sealant, and color differences. Review the completed joint with the specified mirror, channel, and lamps operating before repeated installation.
5. What should installers do when vanity backsplash wall tolerance is exceeded?
Photograph and measure the full condition, stop trimming or fixing, and send the wall survey, template, cabinet position, top drawing, mock-up record, and room code for review before any trade changes the assembly.
Quick-Reference Checklist for Vanity Wall and Backsplash Installation
- Measure the finished wall at the actual top and backsplash elevations.
- Record bow, corner angle, front and rear widths, mirror channels, and outlets.
- Approve the joint, return, scribe, filler, or wall-correction response.
- Coordinate cabinet position with basin, faucet, plumbing, mirror, and circulation.
- Set a stop-work threshold for gaps outside the approved range.
- Photograph the completed mock-up under the intended mirror and ceiling lights.
Final Conclusion
Vanity backsplash wall tolerance belongs in the approved bathroom package before fabrication. Measure the finished room, define where variation will be absorbed, coordinate the cabinet and fixtures, and give installers a clear stop-work threshold.
Here's what I'd do: approve one honest joint instead of drawing a fictional zero gap. KA UNITED would rather resolve a bowed wall on paper than ask an installer to sculpt the answer from sealant.

References
- Bathroom Planning Guidelines, National Kitchen and Bath Association.
- Architectural Woodwork Standards, Architectural Woodwork Institute.
- Dimension Stone Design Manual, Natural Stone Institute.
- C920 Standard Specification for Elastomeric Joint Sealants, ASTM International.
- ANSI A117.1 Accessible and Usable Buildings and Facilities, ICC.
- Hospitality Design Guidance and Case Coverage, Hospitality Design.
- Bathroom Design Trends Study, Houzz.
- Search Essentials and Helpful Content Guidance, Google Search Central.